


How to Set Up Britax Car Seat: Easy Steps for Safe Installation

Setting up your Britax car seat might feel tricky at first, but it doesn’t have to be. You want to make sure your little one is safe and comfortable every time you hit the road.
This guide will walk you through the simple steps to install your Britax car seat correctly and quickly. By the end, you’ll feel confident knowing your child is secure, giving you peace of mind on every trip. Keep reading to learn exactly how to get it right the first time.
Choosing The Right Britax Car Seat
Choosing the right Britax car seat is key to your child’s safety and comfort. Different seats fit different needs. Knowing which one suits your child saves time and worry. It also helps you install the seat correctly.
Britax offers a range of car seats. Each type supports a specific age and weight group. Picking the right type ensures your child stays secure on every ride.
Types Of Britax Car Seats
Britax car seats come in three main types. Infant car seats are for newborns and small babies. They usually face the rear of the car. Convertible car seats grow with your child. They switch from rear-facing to forward-facing. Booster seats are for older kids. They raise the child to fit the car’s seat belt properly.
Matching Seat To Child’s Age And Weight
Each Britax car seat has weight and height limits. Check your child’s current size before choosing a seat. Infant seats fit babies up to 35 pounds. Convertible seats often hold children up to 65 pounds. Booster seats support kids from 40 to 120 pounds.
Age matters too. Infants should always ride rear-facing. Toddlers move to forward-facing seats when they outgrow rear-facing. Older children use boosters until seat belts fit well without help.

Credit: csftl.org
Preparing Your Vehicle
Preparing your vehicle is the first step to safely install a Britax car seat. This step ensures the seat fits well and keeps your child secure. Taking time to prepare helps avoid mistakes and saves time during installation.
Selecting The Best Seat Location
The back seat is the safest place for a car seat. Choose the middle seat if possible. It is farthest from the doors and airbags. If the middle seat is too small or has no seat belt, use the side seats. Make sure the seat is flat and firm. Avoid installing the car seat where the seat is soft or uneven.
Checking Vehicle Seat Compatibility
Check your vehicle’s manual for car seat rules. Look for instructions about seat belt types and LATCH anchors. LATCH anchors make installation easier and safer. Confirm that your car has these anchors in the chosen seat. Also, check that your car seat fits the space well. The seat should not move more than one inch side to side or front to back.
Installing The Car Seat Base
Installing the car seat base is the first step to secure your Britax car seat. The base holds the seat firmly in place. A properly installed base keeps your child safe during travel.
There are two main ways to install the base. You can use the LATCH system or the vehicle seat belt. Both methods provide strong and safe attachment. Choose the option that fits your car best.
Using Latch System
The LATCH system uses built-in anchors in your car seat. Find the lower anchors between the seat cushions. Attach the base connectors to these anchors.
Push down on the base while tightening the straps. This removes slack and makes the base tight. The base should not move more than one inch side to side.
Check the angle indicator on the base. Adjust the recline to match your car seat’s instructions. A correct angle helps protect your child’s head and neck.
Securing With Seat Belt
Thread the vehicle seat belt through the belt path on the base. Lock the seat belt by pulling it all the way out, then let it retract.
Push the base down firmly while tightening the seat belt. Make sure the base does not move side to side or front to back.
Check the base angle again. Adjust as needed for the right recline. A stable base keeps your child secure and comfortable.
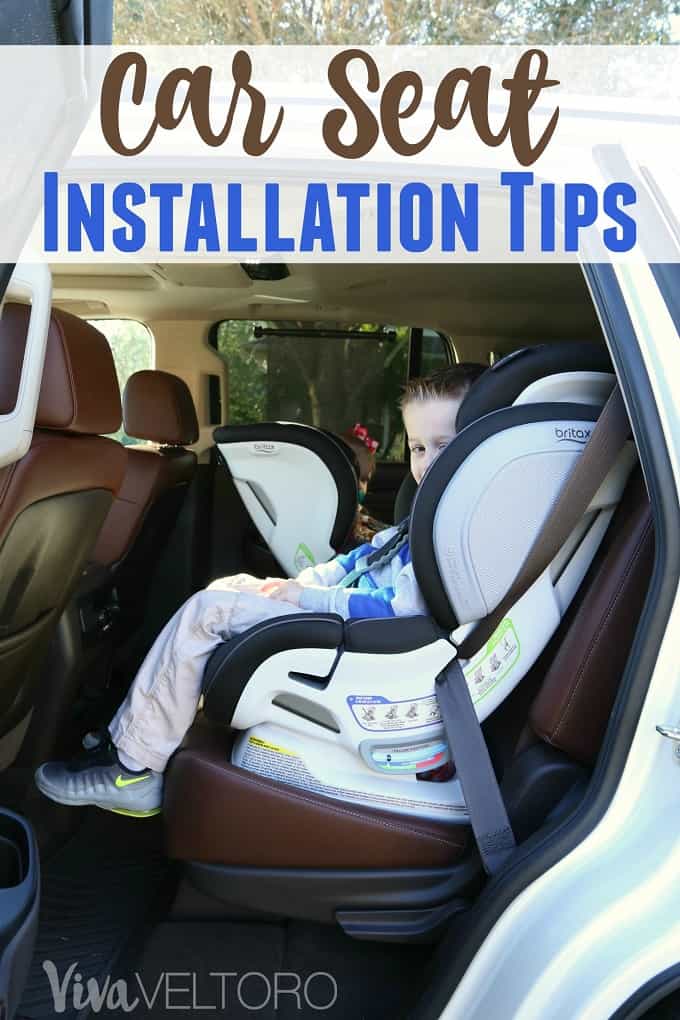
Credit: www.vivaveltoro.com
Attaching The Car Seat
Attaching the Britax car seat properly is crucial for your child’s safety. This step ensures the seat stays secure during travel. Follow these simple instructions to attach the seat correctly.
Locking The Seat Onto The Base
Start by placing the car seat on the base. Align the connectors with the base’s locking points. Push down firmly until you hear a click. This sound means the seat is locked in place. Double-check by gently lifting the seat. It should not move or lift off the base.
Ensuring A Tight Fit
Check the seat’s stability by pushing it side to side and front to back. The seat should not shift more than an inch. If it moves, adjust the base or seat and try locking it again. A tight fit keeps your child safe during sudden stops or turns.
Adjusting Harness And Straps
Adjusting the harness and straps of a Britax car seat is key to keeping your child safe. Proper adjustment ensures the harness fits snugly and holds your child securely. It also prevents the straps from being too loose or too tight, which can be unsafe.
This section explains how to position the harness correctly and check the strap tightness. Follow these steps carefully for the best protection.
Positioning The Harness
Place the harness straps at or just below your child’s shoulders for rear-facing seats. For forward-facing seats, the straps should be at or just above the shoulders. Adjust the harness height by moving the straps through the slots on the seat.
Ensure the harness lies flat without twists. Twisted straps reduce safety and comfort. Check that the chest clip is at armpit level to keep the straps in place.
Checking Strap Tightness
Pull the harness adjustment strap to tighten the straps. The harness should be snug but not too tight. Try the pinch test: you should not be able to pinch any slack at the shoulder.
Loose straps can cause injury during a crash. Tight straps keep your child secure and comfortable. Adjust the straps every time you use the car seat to match your child’s size.

Credit: m.youtube.com
Verifying Installation Safety
Verifying installation safety is a crucial step after setting up your Britax car seat. It ensures your child stays secure during every ride. Proper checks help avoid common mistakes that can reduce protection. Taking time to verify installation gives peace of mind and protects your little one.
Performing The Wiggle Test
The wiggle test checks how tightly the car seat is installed. Grab the seat at the base and try to move it side to side and front to back. A well-installed seat should not move more than one inch. If it moves too much, tighten the straps or seat belt. Repeat the test until the seat feels firm and stable.
Reading Indicator Lights
Many Britax car seats have indicator lights that show if the installation is correct. Look for green lights or symbols that signal a secure fit. Red lights or warnings mean the seat needs adjustment. Check these indicators every time you install the car seat. They provide a quick and easy way to confirm safety.
Maintaining Your Britax Car Seat
Maintaining your Britax car seat is important for safety and comfort. A clean and well-kept seat lasts longer. It protects your child during every trip. Regular care helps spot problems early. This keeps the seat working properly. Follow simple steps to keep the seat in top shape.
Regular Inspection Tips
Check the car seat before each use. Look for cracks or broken parts. Make sure the harness is not frayed or worn. Confirm the buckles click securely. Check that the straps are tight and not twisted. Inspect the base for a proper fit in the car. Replace any damaged parts immediately. Keep small items and toys away from the seat. This avoids choking hazards and damage.
Cleaning And Care Guidelines
Remove the seat cover and wash it as per instructions. Use mild soap and cold water for cleaning. Avoid harsh chemicals that can damage the fabric. Wipe the plastic parts with a damp cloth. Let all parts dry completely before reassembling. Do not use a dryer for the cover. Store the seat in a dry place when not in use. Avoid leaving it in direct sunlight for long periods. This protects the material from fading and cracking.
Frequently Asked Questions
How Do I Install A Britax Car Seat Safely?
To install a Britax car seat safely, read the manual carefully. Use either the LATCH system or seat belt. Ensure the seat is tightly secured with minimal movement. Check the recline angle and harness fit. Always follow specific model instructions for best safety.
When Should I Switch To A Britax Booster Seat?
Switch to a Britax booster seat when your child outgrows the forward-facing car seat. Usually, this is when they reach 40-65 pounds or exceed height limits. Ensure your child fits the booster correctly with the seat belt positioned properly across the chest and lap.
How Tight Should The Britax Car Seat Harness Be?
The Britax car seat harness should be snug but comfortable. Tighten it until you cannot pinch any excess webbing at the shoulders. The harness should lie flat without twists. Proper tightness ensures your child is secure and protected during travel.
Can I Use A Britax Car Seat On An Airplane?
Yes, many Britax car seats are FAA-approved for airplane use. Check the specific model for approval labels. Secure the car seat using the airplane seat belt. Always confirm airline policies before travel to ensure compliance and safety.
Conclusion
Setting up a Britax car seat is simple with clear steps. Always read the manual before starting. Make sure the seat fits tightly in your car. Double-check the straps to keep your child safe. Practice a few times to feel confident.
Safety matters most when traveling with kids. A properly installed car seat protects your little one every trip. Take your time, and don’t rush the process. This care helps ensure peace of mind on the road.


