


How to Reupholster a Car Seat: Step-by-Step Guide

Do you want to give your car a fresh, new look without spending a fortune? Reupholstering your car seat might just be the perfect DIY project for you.
Imagine the satisfaction of transforming those tired, worn-out seats into something that looks and feels brand new. You don’t need to be a professional upholsterer to achieve stunning results. With a little patience and the right guidance, you can do it yourself.
In this guide, you’ll discover simple, step-by-step instructions to reupholster your car seat, saving you money and giving your vehicle a personal touch. Let’s get started and unlock the secrets to a more stylish and comfortable drive.
Tools And Materials Needed
Reupholstering a car seat transforms your vehicle’s interior. To succeed, gather the right tools and materials. With the proper equipment, the task becomes easier and the results more professional. This section outlines essential items for a smooth and effective process.
Tools Needed
A staple remover is crucial. It helps remove old fabric securely attached to the seat. Pliers are useful too. They grip and pull stubborn staples from the frame. A screwdriver assists in dismantling the seat. It comes handy for screws and bolts. A staple gun fastens new fabric to the seat frame. Make sure it’s heavy-duty for better results.
Materials Required
High-quality upholstery fabric is a must. Choose a durable and stain-resistant material. Foam padding provides comfort. It adds extra cushioning to the seat. Adhesive spray bonds the foam to the seat. It ensures the foam stays in place. New staples secure the fabric. Ensure they fit the staple gun perfectly.
Safety Gear
Safety glasses protect your eyes from flying staples. Wear them during the staple removal and installation. Gloves safeguard your hands. They prevent cuts and injuries from sharp tools. A dust mask keeps harmful particles out. Use it during sanding and cleaning.
Measuring And Cutting Tools
A measuring tape ensures accuracy. It helps measure fabric and foam dimensions. A fabric scissors cuts fabric neatly. Ensure they are sharp for clean edges. A utility knife trims foam padding. It offers precision in cutting shapes.
Cleaning Supplies
A vacuum cleaner removes debris. It cleans the seat thoroughly before starting. A mild detergent cleans the seat frame. It removes dirt and grime effectively. A soft cloth wipes surfaces. Use it to apply the detergent and dry the frame.

Credit: www.youtube.com
Removing The Seat
Reupholstering a car seat begins with removing the seat properly. This step is crucial for a smooth reupholstery process. It requires patience and attention to detail. Understanding the correct method ensures you won’t damage your vehicle. Follow these steps carefully to make the task easier.
Step 1: Gather Necessary Tools
Before starting, gather all necessary tools. A socket wrench set is essential. You may need a screwdriver and pliers. These tools help loosen bolts and disconnect wires.
Step 2: Disconnect The Battery
Safety first! Disconnect your car’s battery. This prevents electrical shocks and ensures safety. It’s a simple step but often overlooked.
Step 3: Locate And Remove Bolts
Look for bolts securing the seat to the car’s floor. These are usually at the seat’s base. Use your socket wrench to remove them. Keep these bolts in a safe place.
Step 4: Disconnect Wires And Cables
Modern seats have wires for heating and sensors. Carefully disconnect these wires. Tugging can cause damage. If unsure, consult your car’s manual for guidance.
Step 5: Lift The Seat Out
With bolts and wires removed, lift the seat carefully. It may be heavy, so ask for help if needed. Ensure no wires are caught or tangled.
Step 6: Place The Seat On A Work Surface
Find a clean, flat surface for the seat. This makes the reupholstering easier. A table or workbench is ideal for this task.
Detaching The Old Upholstery
Reupholstering a car seat begins with removing the old fabric. This step is crucial for a smooth transformation. It requires patience and attention to detail. Let’s dive into the process.
Remove The Seat From The Car
Start by carefully removing the seat from the car. Use appropriate tools to unscrew bolts. Keep all screws and bolts safe. This ensures easy reinstallation later.
Identify And Remove Fasteners
Examine the seat for clips and fasteners. These hold the upholstery in place. Use pliers or a flathead screwdriver. Gently pry them off without damaging the seat.
Peel Off The Old Fabric
Carefully peel the fabric off the seat. Start from one corner. Work slowly to avoid ripping the foam underneath. This step requires a gentle touch.
Detach The Seat Cover
Once the fabric is loose, remove the seat cover. Check for any hidden attachments. Use a seam ripper if needed. Ensure no fabric remains attached.
Inspect The Foam Padding
With the fabric removed, inspect the foam padding. Look for any damage or wear. Replace if necessary. This ensures comfort and durability.
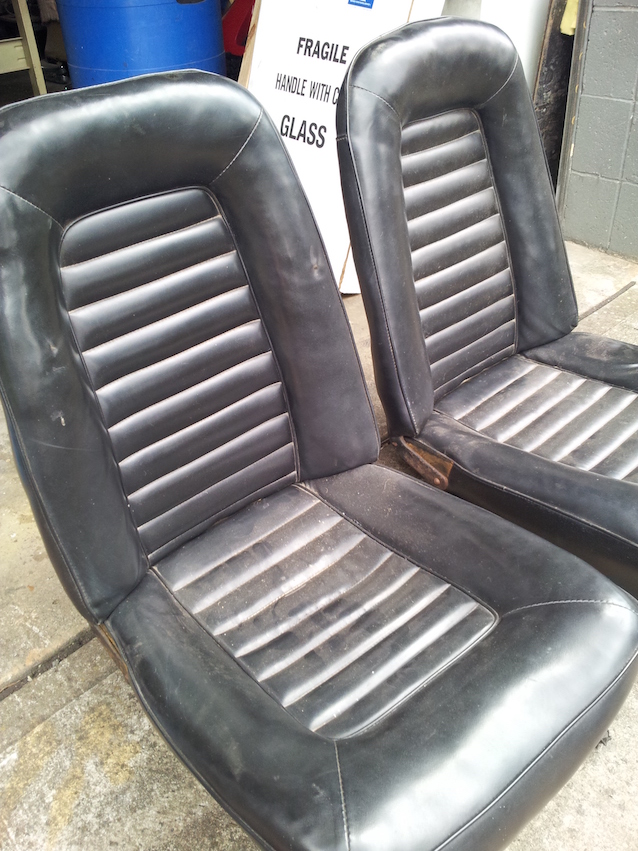
Credit: www.thehogring.com
Preparing The Foam
Preparing the foam is a crucial step in reupholstering car seats. Ensuring the foam is in good condition makes the seat comfortable and durable. Damaged foam can lead to uneven seating and discomfort. Proper preparation helps the upholstery last longer and look better.
Check The Foam Condition
Start by examining the foam for any damage or wear. Look for tears, holes, or areas that have flattened. These imperfections can affect the seat’s comfort and appearance.
Clean The Foam Surface
Use a vacuum to remove dust and debris from the foam. This ensures a clean base for new upholstery. Avoid using water as it can damage the foam.
Repair Or Replace The Foam
If the foam has minor damage, consider using a foam repair kit. These kits can patch up small holes or tears. For extensive damage, replacing the foam might be necessary. New foam provides better support and comfort.
Cut Foam To Fit
Measure the seat area accurately before cutting the foam. Use a sharp knife or foam cutter for clean edges. Ensure the foam fits snugly within the seat frame.
Secure The Foam In Place
Place the foam on the seat frame and ensure it fits well. Use adhesive spray or glue to keep it secure. This prevents shifting when the car is in motion.
Cutting New Fabric
Cutting new fabric for a car seat is a crucial step. It gives your car interior a fresh look. It’s important to be precise. Any mistakes can be costly. Start by understanding the basics. Know what tools you need. A sharp pair of scissors, a measuring tape, and chalk are essential. Let’s explore how to measure and choose the right fabric.
Measuring The Fabric
Begin by measuring the old seat cover. This ensures accuracy. Remove the old cover carefully. Lay it flat on a surface. Use a measuring tape to note dimensions. Measure length and width. Don’t forget the depth. Mark the measurements on paper. This will be your guide. Double-check each number. Accuracy is key.
Choosing The Right Fabric
Selecting the right fabric affects durability and comfort. Consider the car’s usage. For high traffic, choose strong materials. Leather and vinyl are durable. They are easy to clean. For comfort, cotton or polyester blend works well. Check the fabric’s stretch. It should fit snugly on the seat. Match the color with your car’s interior. This enhances aesthetic appeal. Test a small piece before finalizing. Ensure it meets your needs.
Sewing The Fabric
Reupholstering a car seat can transform your vehicle’s interior. Sewing the fabric is a crucial step in this process. It requires careful attention to detail and precision. With the right techniques, your car seats will look refreshed and stylish. Let’s dive into the essentials of sewing the fabric for car seat upholstery.
Gathering Your Materials
Start with a strong thread and a sewing machine. Choose a needle suitable for heavy fabric. Ensure you have scissors and pins ready. These tools are essential for a smooth sewing process.
Preparing The Fabric
Cut the fabric to fit your car seat measurements. Leave extra inches for seams. Pin the fabric pieces together securely. This prevents slipping during sewing. Use chalk to mark seam lines clearly.
Setting Up The Sewing Machine
Adjust the machine settings for thick fabric. Use a strong needle and durable thread. Test your settings on scrap fabric. Confirm the stitch length and tension are correct. Proper setup ensures neat and sturdy stitches.
Starting To Sew
Begin sewing along the marked lines. Keep the fabric taut but not stretched. Use steady hands for straight seams. Backstitch at each end to secure the thread. This reinforces the fabric against wear.
Checking And Adjusting
Review the sewn seams for any loose threads. Trim excess fabric from the edges. Ensure all seams are aligned correctly. Adjust any uneven stitches. This attention to detail ensures a polished finish.
Final Touches
Press the seams with an iron for a crisp look. Inspect the upholstery for any imperfections. Make final adjustments as needed. Enjoy your new, refreshed car seat appearance.
Attaching The New Upholstery
Attaching the new upholstery involves carefully aligning fabric and securing it tightly to the car seat frame. Smooth out wrinkles and ensure even tension for a neat finish. This step is crucial for a professional look.
Attaching the new upholstery to your car seat can feel rewarding. This process transforms the seat’s look and comfort. Start by getting the new fabric ready. Make sure it matches the seat’s shape and size. This step demands care and attention to detail. It sets the foundation for a neat and professional finish.
Securing The Fabric
Begin by aligning the fabric with the seat frame. Use the original seams as a guide. Carefully pull the fabric over the seat. Ensure it fits snugly. Use clips to hold the fabric temporarily. This helps keep it in place. Next, use a staple gun to secure the fabric. Start from the center and work outward. This prevents shifting and ensures even tension. Pay attention to corners and curves. They may need extra staples for a tight fit.
Checking For Wrinkles
Inspect the fabric for wrinkles or loose areas. Run your hand across the seat. Feel for any irregularities. Smooth out wrinkles by gently stretching the fabric. Re-staple any loose sections. Make adjustments as needed. A smooth surface looks professional and feels comfortable. Remember, patience is key. Take your time for the best results.

Credit: www.kovifabrics.com
Reinstalling The Seat
Reupholstering a car seat can breathe new life into your vehicle. After transforming its appearance, reinstalling the seat is your final step. This process is crucial for ensuring safety and comfort. Follow these straightforward steps to complete your upholstery project.
Securing The Seat Back
Position the seat back into the vehicle carefully. Align it with the original brackets. Use the bolts and screws you removed earlier. Tighten them firmly to ensure stability. Check for any wiggle or movement.
Attaching The Seat Base
Lift the seat base into its position. Ensure it aligns correctly with the brackets. Use a wrench to secure it. Make sure the base is stable. Test the seat by pressing down gently.
Reconnecting Electrical Components
If your seat has electrical components, reconnect them. Look for the wiring harness under the seat. Connect it securely, ensuring no loose wires. Test the seat’s functions, like heating or adjustments.
Final Inspection
Inspect the seat installation thoroughly. Confirm all bolts and screws are tight. Check the seat’s alignment with other car interiors. Make sure the seat feels sturdy. A well-installed seat ensures a safe ride.
Maintenance Tips
After reupholstering a car seat, proper maintenance is vital. It ensures longevity and keeps your seats looking fresh. Regular care prevents damage and maintains comfort.
Clean Regularly
Dust and debris accumulate quickly on car seats. Use a soft brush or vacuum to remove them weekly. This prevents stains and wear.
Use Suitable Cleaners
Choose cleaners that match your upholstery fabric. Avoid harsh chemicals that can cause fading. Test any new product on a small area first.
Protect From Sunlight
Direct sunlight can fade upholstery. Use car shades or park in shaded areas to protect your seats. Consider UV protectant sprays for extra protection.
Address Spills Immediately
Spills can stain if left untreated. Blot spills with a clean cloth immediately. Avoid rubbing as it can spread the stain.
Check For Loose Threads
Loose threads can lead to further damage. Trim them with sharp scissors promptly. This prevents unraveling and maintains a neat appearance.
Use Seat Covers
Seat covers add an extra layer of protection. They shield from spills and wear. Choose covers that fit well for maximum benefit.
Frequently Asked Questions
What Tools Are Needed To Reupholster A Car Seat?
To reupholster a car seat, you’ll need basic tools like pliers, a staple gun, fabric scissors, and a sewing machine. Additional materials include new upholstery fabric, foam padding, and adhesive spray. Having these tools ensures a smooth and efficient reupholstering process.
How Long Does It Take To Reupholster A Car Seat?
Reupholstering a car seat typically takes a few hours. The time depends on your skill level and seat complexity. Beginners might take longer, but with practice, the process becomes quicker. It’s a rewarding DIY project that can transform your car’s interior.
Can I Reupholster A Car Seat Myself?
Yes, you can reupholster a car seat yourself. With the right tools and materials, it becomes an achievable DIY project. There are many online tutorials available to guide you through the process. It’s a cost-effective way to refresh your car’s interior.
What Fabric Is Best For Car Seat Reupholstery?
The best fabric for car seat reupholstery is durable and easy to clean. Popular choices include leather, faux leather, and heavy-duty polyester. These materials are resistant to wear and stains, ensuring longevity. Choose a fabric that matches your style and meets your needs.
Conclusion
Reupholstering a car seat is a rewarding task. It transforms the interior. With the right tools, anyone can do it. Start with removing the old fabric. Then, carefully cut and attach new material. Take your time, and ensure tight fits.
This project saves money and personalizes your car. Plus, it extends the life of your seats. Practice makes perfect. Soon, you’ll enjoy a fresh, comfortable ride. Remember, patience and precision are key. Happy reupholstering!


