

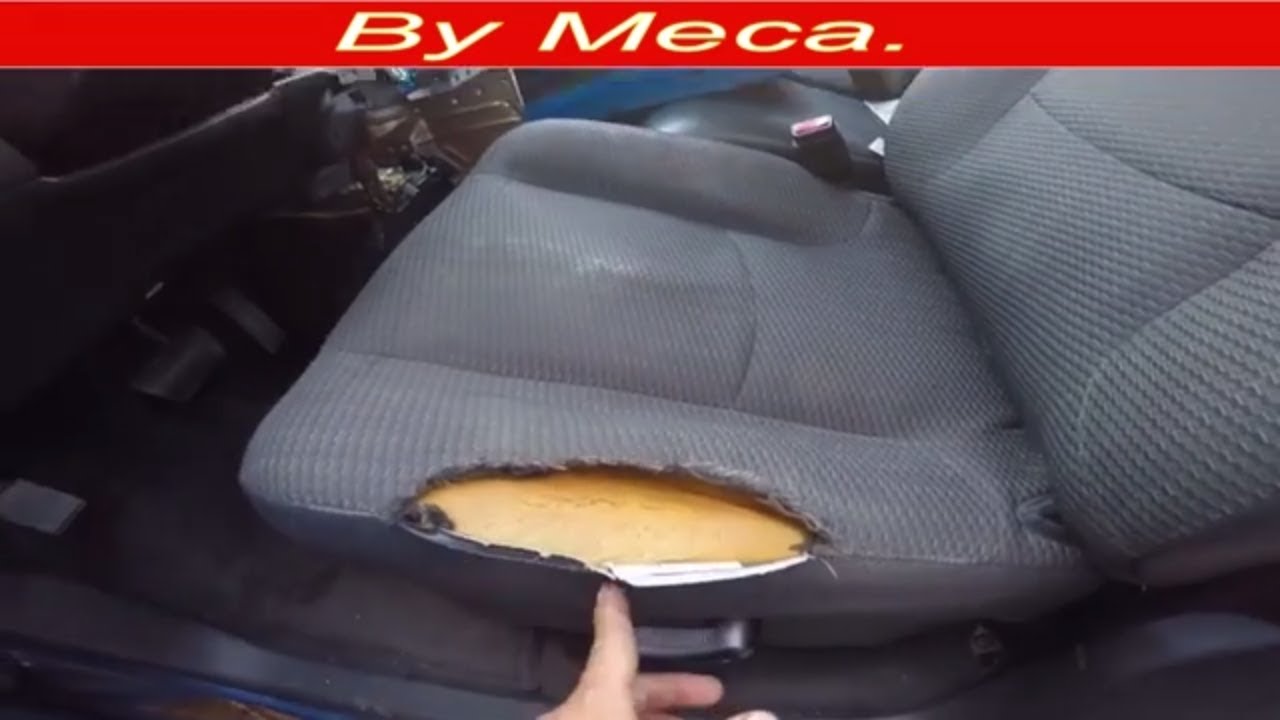
How to Repair a Torn Car Seat: Easy DIY Guide

Imagine sliding into your car, ready for the day ahead, and then you notice it—the unsightly tear in your car seat staring back at you. It’s frustrating, right?
You might feel like the only solution is an expensive trip to the upholstery shop. But what if there’s a simpler way? What if you could fix that tear yourself, saving money and restoring your car’s interior to its former glory?
You’ll discover step-by-step instructions on how to repair a torn car seat with ease. Whether you’re dealing with fabric, leather, or vinyl, we’ve got tips and tricks to make the process straightforward and stress-free. You’ll feel empowered knowing you can tackle this issue without breaking the bank. So, grab your repair kit and let’s get started on transforming your car seat from worn to wonderful. Your car deserves it, and so do you.
Tools And Materials Needed
Repairing a torn car seat can seem daunting. With the right tools and materials, it becomes manageable. Gathering these essentials beforehand saves time and frustration. This section outlines what you’ll need for a successful repair.
Tools Required
Several tools are vital for car seat repair. A sewing machine is invaluable. It helps create durable stitches. You’ll need scissors to cut threads and fabric. A needle is necessary for hand-stitching small tears. A seam ripper helps remove old threads easily. Finally, a fabric glue gun can assist in quick fixes.
Materials Needed
Choosing the right materials is crucial. You’ll need strong thread for stitching. Heavy-duty upholstery thread works well. Fabric patches match the seat material. They cover larger tears effectively. You might need foam if the seat padding is damaged. Vinyl or leather paint can restore color to faded areas. All these materials ensure your repair is seamless.
Assessing The Damage
Repairing a torn car seat starts with assessing the damage. This step is crucial. It helps determine the repair method. Each tear is unique and requires careful inspection. Take your time to evaluate the situation. This ensures a successful repair.
Identifying Tear Type
First, identify the tear type. Is it a straight cut or a hole? A straight cut is often easy to fix. Holes might need more effort. Check the fabric around the tear. Is it weak or frayed? This information is vital. It influences the repair approach.
Measuring The Tear
Next, measure the tear accurately. Use a ruler or tape measure. Note the length and width. This helps in choosing materials. It also assists in planning the repair. Write down these measurements. Keep them handy during the process.
Preparing The Seat
Repairing a torn car seat can seem daunting. But with the right steps, it becomes manageable. The first essential step is preparing the seat. Proper preparation ensures a lasting repair. Let’s delve into the key steps involved in this process.
Cleaning The Area
A clean area is crucial for a smooth repair. Start by vacuuming the seat. This removes dirt and debris. Use a mild fabric cleaner next. Apply it gently over the torn section. Wipe the area with a soft cloth. Make sure no cleaner residue remains. Allow the seat to dry completely. A dry surface helps adhesive bond better.
Removing Loose Threads
Loose threads can hinder a neat repair. Carefully trim any frayed edges. Use sharp scissors for precision. Avoid pulling the threads. Pulling can worsen the tear. Ensure the edges are smooth. This makes patching easier. Check the entire area for missed threads. A thorough inspection prevents future issues.
Choosing Repair Method
Repairing a torn car seat can seem daunting. But with the right method, it becomes manageable. Different methods suit different tears. So, choosing the right one is crucial. This guide helps you decide the best approach. Below are three effective methods to consider.
Sewing The Tear
Sewing is a traditional repair method. It works best for fabric seats. Start by choosing a strong thread. Use a needle suitable for fabric thickness. Begin sewing from one end of the tear. Ensure stitches are tight and close together. This prevents further tearing. Knot the thread securely at the end. Trim any excess thread for a clean finish. Sewing restores seat integrity effectively.
Repair kits are convenient for fixing leather or vinyl seats. These kits include adhesive and fabric compound. Begin by cleaning the tear area. This ensures adhesive sticks well. Apply the compound as per instructions. Use a heat tool to set the compound. This step may require patience. The result is a smooth, seamless finish. Repair kits are great for small to medium tears.
Patching is ideal for large tears. Choose a patch that matches your seat material. Cut the patch slightly larger than the tear. Apply adhesive around the tear edges. Press the patch firmly onto the tear. Let the adhesive dry completely. This method covers the tear visibly. But it strengthens the seat fabric. Patching is a quick and lasting solution.
Sewing Techniques
Repairing a torn car seat can seem challenging. Sewing techniques simplify this task. These methods restore your seat’s original look and feel. With patience and some basic skills, your car seat will look good as new.
Basic Stitch Method
The basic stitch method is simple yet effective. Begin by threading the needle with strong thread. Choose a color matching the car seat fabric. Align the torn edges carefully. Start sewing from one end of the tear. Use small, tight stitches for durability. Pull each stitch taut to avoid gaps. Continue stitching until the tear is fully closed. Tie a knot securely at the end to finish.
Using A Sewing Machine
A sewing machine offers precision and speed. Select a sturdy needle suitable for upholstery fabric. Set the machine to a straight stitch pattern. Match the thread color with the seat fabric. Position the fabric under the presser foot. Lower the needle gently into the fabric. Begin sewing slowly to maintain control. Guide the fabric evenly to prevent bunching. Finish by tying off the thread securely. This technique ensures a professional-looking repair.
Using A Repair Kit
Repairing a torn car seat can seem daunting. Yet, using a repair kit simplifies the process. These kits offer a cost-effective solution. They provide all necessary tools to fix tears efficiently. With the right guidance, your car seat can look new again. This section covers the types of kits available and step-by-step instructions.
Types Of Kits Available
Repair kits come in various forms. Some kits are designed for fabric seats. Others are specific to leather or vinyl. Fabric kits usually include patches and adhesives. Leather kits often have color compounds for a seamless finish. Vinyl kits might offer textured patches. Each kit suits different materials and damage levels. Choosing the right kit ensures the best results.
Step-by-step Kit Instructions
Start by cleaning the damaged area. Remove dirt and debris using a damp cloth. Allow the area to dry completely. Next, follow the kit’s instructions carefully. For fabric seats, cut the patch to fit the tear. Apply adhesive to the patch and seat edges. Press firmly to secure the patch in place. For leather or vinyl, mix the color compounds if required. Apply the compound over the tear with the applicator. Smooth it out for an even finish. Let the repair cure as per the kit’s instructions. Some repairs may need additional layers or heat treatment. Always ensure each layer is dry before proceeding.
Applying A Patch
Repairing a torn car seat involves applying a patch to cover the damaged area. Clean the seat thoroughly before starting. Use a fabric patch that matches the seat color for a seamless look. Secure it with fabric glue or stitching for durability.
Repairing a torn car seat can seem daunting, but applying a patch is a straightforward solution. This technique restores your seat’s appearance and prevents further damage. With the right materials and steps, you can achieve a seamless repair that blends well with the existing fabric.Selecting Patch Material
Choosing the correct patch material is crucial for a successful repair. Match the patch to the seat’s fabric for a cohesive look. Consider color, texture, and durability. Leather seats need leather patches. Cloth seats require cloth patches. The patch should be slightly larger than the tear. This ensures full coverage and easy attachment.Attaching The Patch
Begin by cleaning the torn area. Dirt and debris can affect adhesion. Use a fabric glue or a sewing kit for attachment. Fabric glue offers a quick fix. It bonds the patch securely without visible seams. Sewing provides a sturdy hold. It is ideal for larger tears. Align the patch over the tear carefully. Press firmly if using glue. Stitch evenly if sewing. Ensure the patch sits flat against the seat. This prevents awkward folds and enhances durability.
Credit: www.reddit.com
Finishing Touches
Fixing a torn car seat requires careful attention to detail. Begin by cleaning the area around the tear. Use a fabric patch or adhesive to cover and seal the tear, ensuring a neat finish.
Repairing a torn car seat can be rewarding. The final step is crucial. The finishing touches bring it all together. They ensure the repair looks great and lasts long. Pay attention to details. Make the repaired area blend seamlessly. Let’s explore how to achieve this.Blending With Seat Color
Matching the repair with the seat color is vital. Use a fabric dye or marker. Choose the right shade carefully. Test it on a hidden area first. Ensure it matches perfectly. Apply the color smoothly. Blend the edges well. This makes the repair invisible. A seamless look enhances the car’s interior.Ensuring Durability
Durability matters for a lasting repair. Use strong adhesive or thread. Choose quality materials for reinforcement. Double-check the stitching. Ensure it’s tight and secure. Reinforce weak spots if needed. Inspect the repair thoroughly. Check for any gaps or loose ends. A durable repair saves time and money in the long run.Preventing Future Tears
Repairing a torn car seat helps maintain its appearance and comfort. Use fabric glue or a patch for quick fixes. Regularly inspect seats to prevent future tears and ensure lasting durability.
Preventing future tears in car seats saves time and money. A little care goes a long way. Proper maintenance keeps your seats looking new. Learn how to protect them from damage.Regular Maintenance Tips
Regular maintenance extends the life of your car seats. Vacuum seats weekly to remove dirt. Dirt can weaken the fabric over time. Use a soft brush for stubborn debris. Clean spills immediately to avoid stains. Use mild soap and water for cleaning. Avoid harsh chemicals. They can damage the seat material. Inspect your seats monthly. Look for signs of wear. Address small issues before they grow.Using Protective Covers
Protective covers shield your seats from damage. Choose covers that fit snugly. They prevent sliding and discomfort. Wash covers regularly. This keeps them fresh and clean. Opt for waterproof covers for added protection. They guard against spills and moisture. Consider UV-resistant covers for sunny climates. UV rays can fade seat fabric. Covers are an easy way to keep seats pristine. They also add a personal touch to your car’s interior.
Credit: www.youtube.com
Credit: www.reddit.com
Frequently Asked Questions
How Do I Fix A Small Tear In A Car Seat?
To fix a small tear, clean the area with a mild cleaner. Use fabric glue to seal the edges together. Press firmly and let it dry for a few hours. This will prevent the tear from getting worse and maintain the seat’s appearance.
Can I Sew A Ripped Car Seat Myself?
Yes, you can sew a ripped car seat. Use a heavy-duty needle and matching thread. Carefully stitch along the tear, keeping stitches tight. This method works best for fabric seats. For leather or vinyl, consider using a patch instead of sewing.
What Materials Do I Need For Seat Repair?
For a basic repair, you’ll need fabric glue or a needle and thread. A matching patch can be useful for larger tears. Sandpaper and leather conditioner are needed for leather seats. Ensure you have cleaning supplies to prepare the area before repair.
How Long Does Car Seat Repair Take?
Car seat repair can take from 30 minutes to a few hours. The time depends on the size and complexity of the tear. Small repairs are quicker, while larger or more intricate repairs may require more time and patience.
Conclusion
Repairing a torn car seat can seem daunting at first. But with patience, it becomes manageable. Start by gathering all necessary tools and materials. Follow the step-by-step process carefully. Clean the area before starting the repair. Stitch or patch the tear securely.
This ensures a neat finish. Always test the repair by applying pressure. Make sure it holds well. Regular maintenance prevents future tears. This keeps your car seats in good shape. Enjoy a cleaner, more comfortable ride. A little effort goes a long way in preserving your car’s interior.


