


How to Repair Hole in Leather Car Seat: Expert Tips

You glance over at your leather car seat and notice a glaring hole staring back at you. Your heart sinks a little.
That unsightly gap is not only an eyesore, but it could also lead to further damage if left unattended. But before you start worrying about expensive repairs or replacements, take a deep breath. You can fix it yourself with a little guidance.
Imagine the satisfaction of restoring your car seat to its former glory, all by yourself. In this guide, you’ll discover straightforward, easy-to-follow steps to repair that hole and make your leather seat look as good as new. Let’s dive in and save your seat—and your wallet.
Assessing The Damage
Repairing a leather car seat can be a daunting task. First, understanding the extent of the damage is crucial. This step helps in deciding the right method for repair. Not every hole requires the same approach. Some might need professional help. Others can be fixed at home. Begin with a thorough inspection.
Identifying Types Of Holes
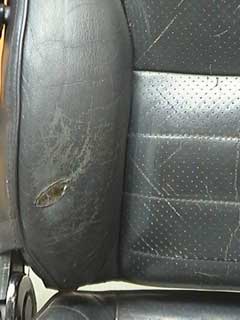
Leather seats can have various types of holes. Common ones include small punctures and larger tears. Punctures often result from sharp objects. Tears usually occur due to stress or aging. It’s vital to identify the hole type. This knowledge aids in choosing the best repair technique. Knowing the material type is also important. Some leather types are more forgiving.
Determining Repair Feasibility
Not every hole is repairable by a DIY method. Small punctures are usually easy to fix. Larger tears might require professional intervention. Assess the seat’s overall condition. If the leather is worn out, a complete replacement may be necessary. Evaluate the cost of repair versus replacement. This ensures you make the best decision for your car seat.
Gathering Necessary Tools
Repairing a hole in a leather car seat starts with gathering the right tools. Proper tools ensure a seamless repair job. A well-prepared workspace aids in achieving professional results. This section outlines essential tools for the task. It also highlights optional tools for enhanced results.
Essential Repair Materials
Begin with a leather repair kit. It includes patch material and adhesive. Scissors are crucial for cutting the patch. A spatula helps spread the adhesive evenly. Use sandpaper to smooth rough edges around the hole. A color-matching dye is necessary to blend the patch. Lastly, a microfiber cloth ensures a clean finish.
Optional Tools For Enhanced Results
A heat gun helps the adhesive set faster. A roller can smooth out air bubbles under the patch. Leather conditioner restores the seat’s shine. A needle and thread secure the patch in place. A cutting mat protects surfaces while working.
Preparing The Leather Surface
Start by cleaning the leather surface with a damp cloth. Remove dirt and grime thoroughly. Ensure the area is dry before starting the repair.
Repairing a hole in a leather car seat starts with proper preparation. This step ensures your repair work will last. Preparation involves cleaning, conditioning, and smoothing the edges. These actions create a solid base for the repair. It’s the foundation for a successful fix.
Cleaning And Conditioning
Begin with a thorough cleaning of the leather surface. Use a soft cloth and a mild leather cleaner. Gently wipe away dirt and grime. This step ensures the repair materials adhere well. After cleaning, condition the leather. Use a quality leather conditioner. It restores moisture and flexibility. This process prevents cracks and brittleness.
Smoothing The Edges
Examine the edges of the hole carefully. Use fine-grit sandpaper to smooth them. This reduces frayed fibers and uneven surfaces. A smooth edge allows better patch adhesion. Wipe away any dust from sanding. This ensures a clean, debris-free surface. Smoothing the edges helps the patch blend seamlessly.
Repair Techniques
Repairing a hole in a leather car seat can be daunting. Fortunately, several techniques can restore your seat’s appearance. Each method has its unique process and benefits. Choose the right one based on the hole size and your expertise level.
Patch Method
The patch method is straightforward. First, clean the area around the hole thoroughly. Use a leather cleaner or mild soap. Next, cut a leather patch slightly larger than the hole. Apply leather adhesive around the hole’s edges. Carefully place the patch over the hole. Press firmly to ensure it sticks. Allow the adhesive to dry completely before using the seat.
Filling Method
This technique works well for small holes. Start by cleaning the hole’s surroundings. Use leather filler, available at most auto stores. Apply the filler into the hole with a spatula or knife. Smooth the filler to match the seat’s surface. Let it dry for the recommended time. Sand lightly for a perfect finish. Finally, apply leather dye for color match.
Sewing Method
Sewing is effective for larger holes or tears. Begin by cleaning the area. Use a needle and strong thread matching the leather color. Start stitching from one end of the hole. Use small, tight stitches for durability. Knot the thread securely at the end. Trim excess thread neatly. Consider professional help for large repairs.
Finishing Touches
Fixing a hole in a leather car seat can be easy with the right steps. Start by cleaning the area around the hole. Then, apply a leather repair kit to restore the seat’s appearance.
Repairing a hole in a leather car seat requires precision. After patching the hole, focus on finishing touches. This step ensures the repair blends seamlessly with the surrounding leather. Proper finishing can make your repair durable and invisible. Let’s dive into the details.
Color Matching
Matching the leather color is crucial. Use a leather dye kit for best results. Choose a dye that matches your seat’s color. Test the dye on a hidden area. This ensures the color matches perfectly. Apply the dye with a soft brush. Brush in a circular motion for even coverage. Let the dye dry completely. Check the patch under different lights. Adjust the color if needed.
Sealing The Repair
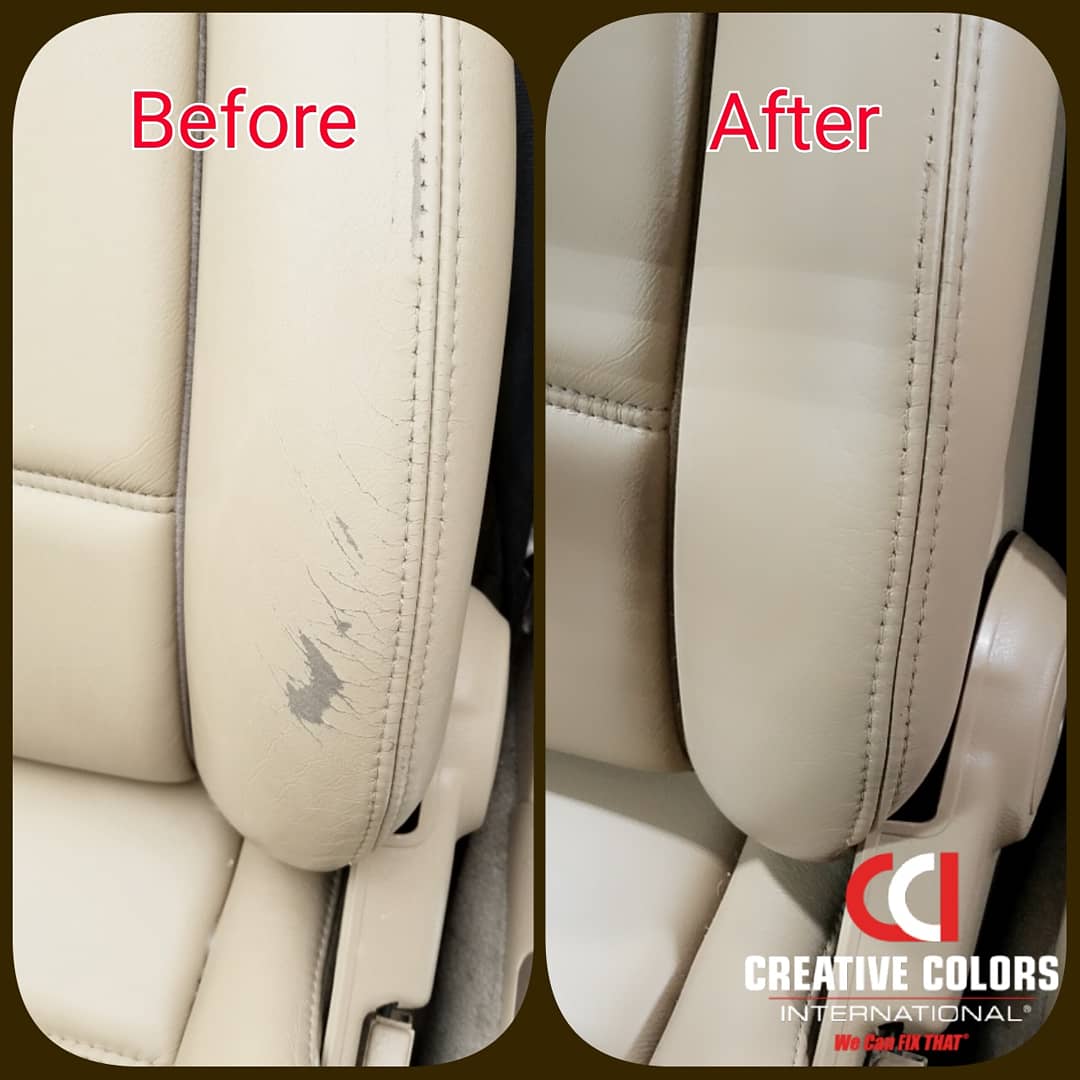
Sealing the repaired area is essential. It protects the patch from wear and tear. Use a leather sealant for this step. Apply the sealant evenly over the patch. Use a sponge or soft cloth. Let the sealant dry for several hours. Check the seal for any missed spots. Apply more sealant if necessary. A proper seal ensures the repair lasts longer. Your leather seat will look as good as new.
Credit: www.furnitureclinic.co.uk
Maintenance Tips
Maintaining your leather car seat after a repair keeps it in good shape. Regular maintenance prevents further damage and extends the life of your seat. Here are some essential tips to keep your leather looking fresh and smooth.
Preventing Future Damage
Keep sharp objects away from your leather seats. This includes keys and tools. They can easily puncture the surface. Use seat covers when transporting heavy or sharp items. This adds an extra layer of protection. Avoid direct sunlight on your seats for long periods. Sunlight can cause fading and cracking. Parking in shaded areas or using sunshades can help.
Regular Care Routine
Clean your leather seats regularly. Use a soft cloth and a mild cleaner. Avoid harsh chemicals. They can damage the leather. Conditioning your leather seats keeps them supple. Apply a leather conditioner every few months. This prevents drying and cracking. Regular vacuuming removes dirt and debris. This keeps the leather clean and prevents scratches.
Credit: wecanfixthat.com
Frequently Asked Questions
How Do You Fix A Small Hole In Leather?
To fix a small hole, clean the area first. Use a leather patch or filler kit. Apply the filler evenly. Allow it to dry completely. Finally, use a leather conditioner to blend the repair with the surrounding area.
Can You Use A Leather Repair Kit?
Yes, a leather repair kit is effective for small repairs. It usually includes patches, filler, and adhesive. Follow instructions carefully for best results. These kits can help restore the seat’s appearance and prevent further damage.
What Tools Are Needed For Leather Repair?
Basic tools needed include a leather repair kit, scissors, and a sponge. You may also need a heat source like a hairdryer. These tools help in applying patches, smoothing filler, and ensuring the repair blends seamlessly.
Is Professional Repair Necessary For Leather Seats?
Professional repair is recommended for large or complex damage. Experts ensure high-quality results and use advanced techniques. They can also match the leather’s color and texture. DIY repairs are suitable for minor issues only.
Conclusion
Fixing a hole in a leather car seat is doable. Gather the right tools first. Follow the steps carefully, as outlined above. This saves you money and keeps your car looking great. Regular maintenance prevents future damage. Check your car seats often for any signs of wear.
A little effort goes a long way in preserving their beauty. With these tips, your leather seats can stay in top condition. Keep your car looking fresh and stylish. Enjoy the satisfaction of doing it yourself. Your car deserves the best care.


