


How to Repair a Vinyl Car Seat: Easy DIY Guide

Is your car seat looking a little worse for wear? Those unsightly tears and cracks in your vinyl car seat can be both an eyesore and a source of frustration.
But don’t worry, you don’t have to live with it or spend a fortune on professional repairs. You can bring your car seat back to life with just a few simple steps. Imagine the satisfaction of sitting in your car, the interior looking pristine, and knowing you did it yourself.
You’ll discover easy, step-by-step methods to repair your vinyl car seat, saving you time and money. Plus, a well-maintained car interior can even enhance your driving experience and boost your car’s resale value. So why wait? Dive in and learn how to transform your car seat from shabby to chic.
Tools And Materials Needed
A vinyl car seat repair requires basic tools and materials. Grab a vinyl repair kit, scissors, and a clean cloth. Ensure you have adhesive, a patch, and a heat source to complete the task efficiently.
Repairing a vinyl car seat is a straightforward task. It requires some specific tools and materials. Having the right items ensures a smooth repair process. Let’s explore what you need.
Vinyl Repair Kit
A vinyl repair kit is essential. It includes patches, adhesives, and a color compound. These items help fix small tears or holes. Choose a kit that matches your seat’s color.
Cleaning Materials
Before repairs, clean the seat thoroughly. Use a mild soap and water. A soft cloth will help remove dirt. Clean surfaces allow adhesives to stick better.
Scissors
Scissors are useful for cutting patches. You need sharp scissors. They should cut vinyl smoothly, without tearing. Properly cut patches blend well with the seat.
Sandpaper
Sandpaper is useful for smoothing rough edges. Use a fine-grit sandpaper. It helps blend the patch with the seat. Smooth edges improve the seat’s appearance.
Heat Gun
A heat gun helps seal patches. Use it to warm the adhesive. Heat ensures a strong bond. Be careful not to overheat the vinyl.
Applicator Tool
An applicator tool spreads the adhesive evenly. It ensures a neat finish. Use it to press patches firmly onto the seat. A smooth application makes repairs less noticeable.
Protective Gloves
Wear protective gloves during repairs. They keep your hands safe from chemicals. Gloves also prevent fingerprints on the vinyl. Choose gloves that fit comfortably. Having these tools and materials ready makes the repair process easy. Your car seat will look great again with the right preparation.
Identifying Damage Types
Identifying damage types on a vinyl car seat helps in choosing the right repair method. Scratches, tears, or burns require different approaches to restore the seat’s appearance. Recognizing the specific damage ensures effective repair and prolongs the seat’s lifespan.
Identifying damage types in vinyl car seats is crucial. Each type of damage needs specific repair techniques. Understanding these types helps you address the issues effectively. Let’s explore the common types of vinyl car seat damage.
Tears And Rips
Tears and rips are common in vinyl seats. They occur due to sharp objects or excessive force. Small tears can spread if ignored. Use a vinyl repair kit for small rips. For larger tears, professional help might be needed. Regular inspection can prevent further damage.
Cracks And Holes
Cracks form from extended exposure to sun and heat. They cause the material to dry and weaken. Holes can appear from repeated friction or pressure. Use a vinyl filler to patch small holes. For cracks, a sealant helps in restoring the surface. Keep your car in the shade to avoid cracking.
Stains And Discoloration
Stains and discoloration affect seat appearance. Spills and dirt are common culprits. Discoloration might occur from prolonged sun exposure. Clean stains immediately with mild soap and water. For tough stains, specialized vinyl cleaners work best. Regular cleaning keeps your seats looking new.
Preparing The Seat
Repairing a vinyl car seat starts with proper preparation. This crucial step ensures long-lasting results. A well-prepared seat allows repair materials to adhere better. It also prevents further damage. Follow these steps to prepare your vinyl car seat effectively.
Cleaning The Surface
Start by cleaning the seat’s surface. Use a mild soap mixed with warm water. Apply the solution using a soft cloth. Gently scrub the vinyl to remove dirt. Pay attention to creases and seams. These areas often hide grime. Avoid harsh chemicals. They can damage the vinyl further. Rinse the surface with clean water. Use a damp cloth for this step. Ensure all soap residues are gone.
Drying Properly
Proper drying is essential after cleaning. Use a soft towel to pat the seat dry. Ensure you remove all moisture. Moisture can lead to mold or mildew. Allow the seat to air dry completely. This may take a few hours. Do not rush this process. A fully dry seat ensures repair materials stick well.
Repairing Tears And Rips
Repairing tears and rips in vinyl car seats can extend their life. It helps maintain your vehicle’s interior appeal. These repairs are cost-effective and simple. Even beginners can handle them with the right tools. Let’s explore some methods to fix those unsightly tears.
Using Vinyl Repair Kits
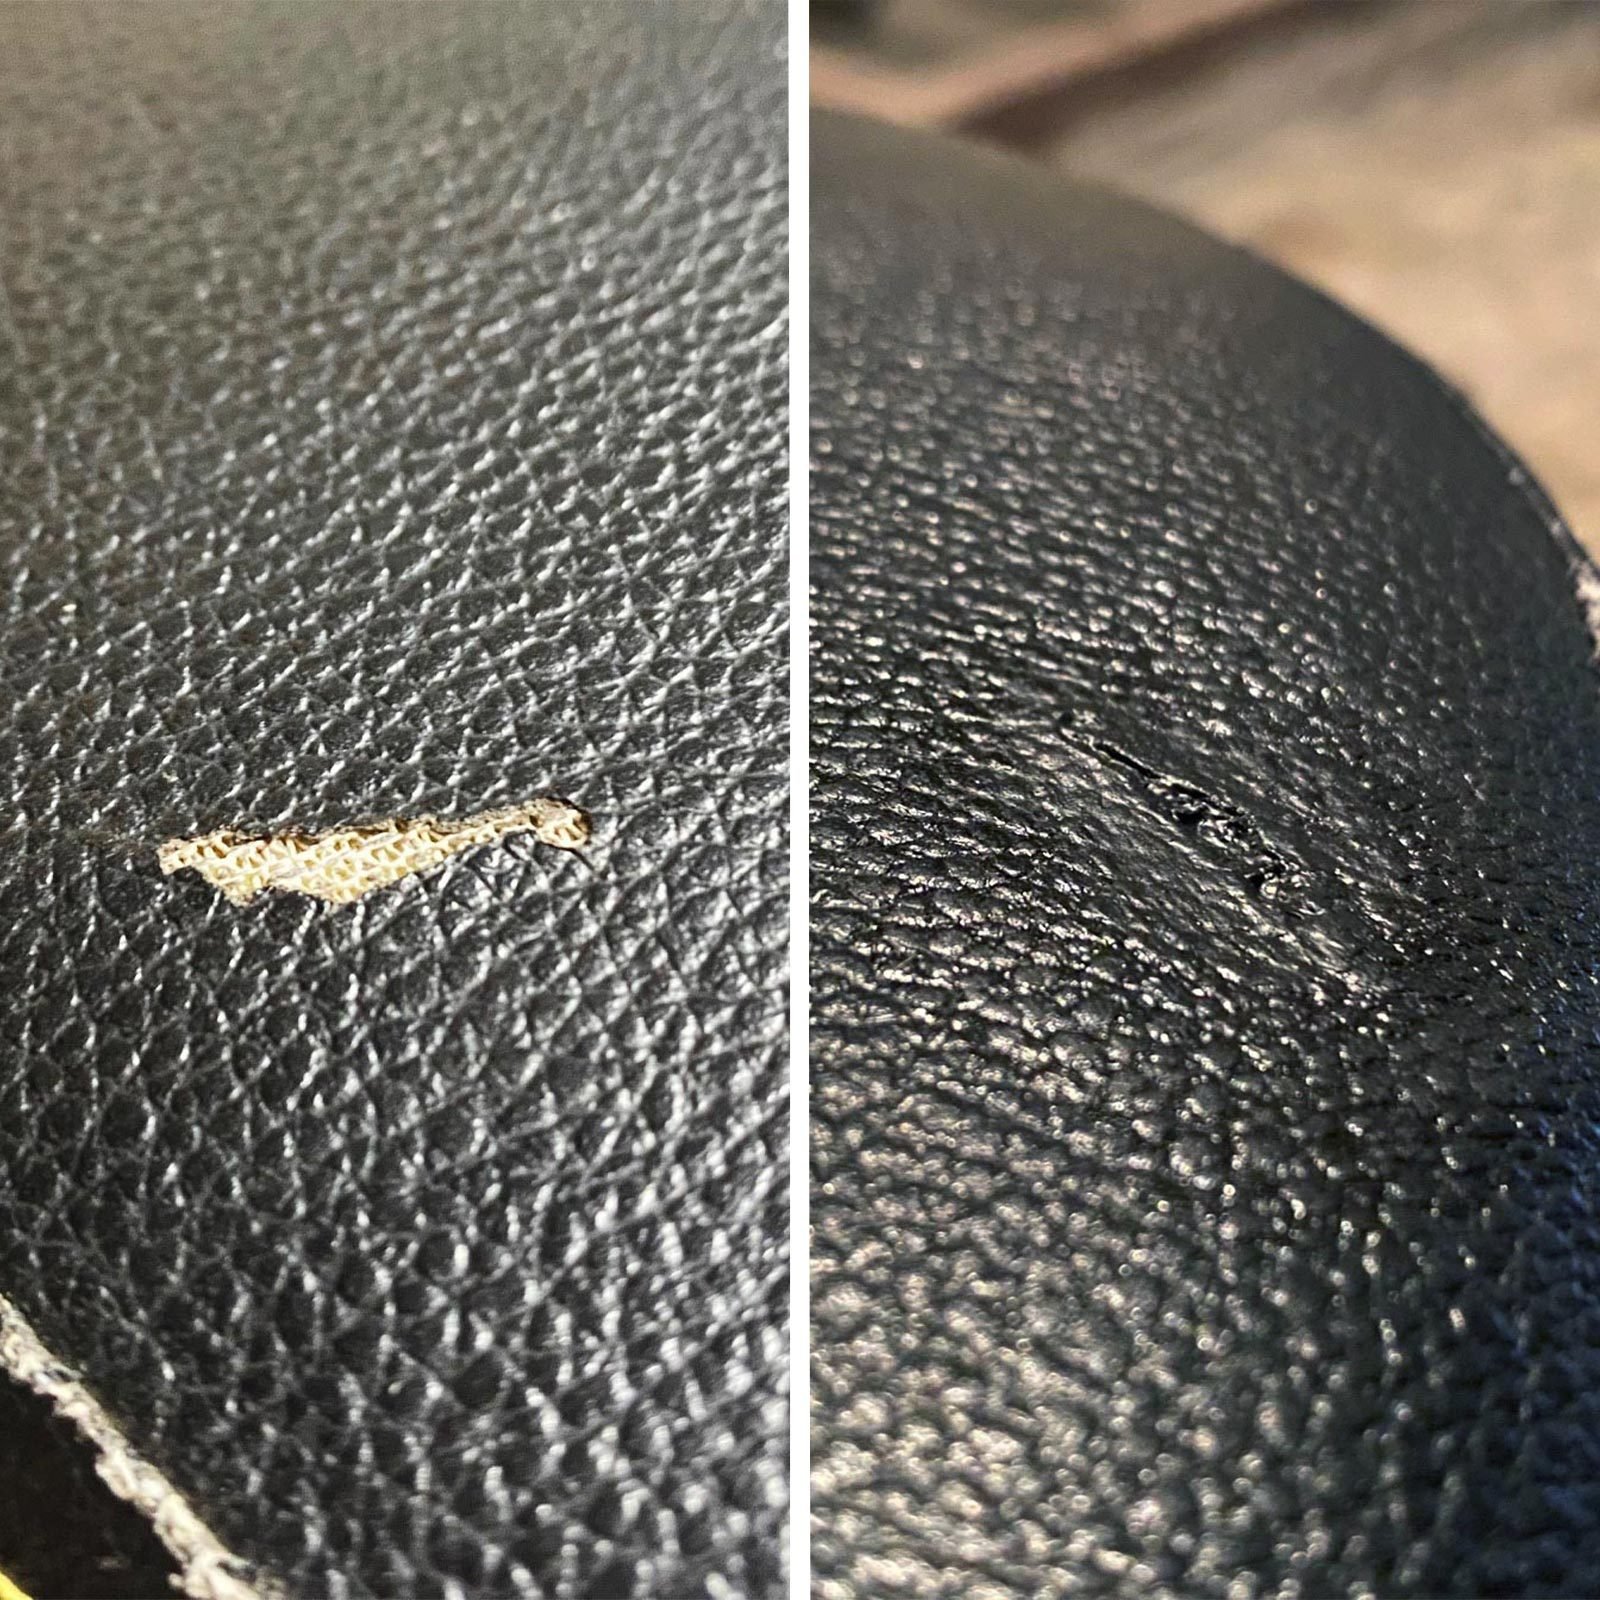
Vinyl repair kits are a great solution for small tears. They are affordable and easy to use. Most kits include a color-matching guide. This ensures a seamless repair that blends perfectly. Start by cleaning the damaged area. Use a soft cloth and mild soap to remove dirt. Then, trim any loose threads around the tear. This prepares the surface for the repair compound.
Mix the vinyl compound according to the instructions. Apply it carefully with the provided tool. Ensure the compound fills the tear completely. Use a textured paper from the kit. Press it gently over the wet compound. This mimics the seat’s original texture. Allow the compound to dry as directed. Once dry, remove the textured paper. The tear should now be almost invisible.
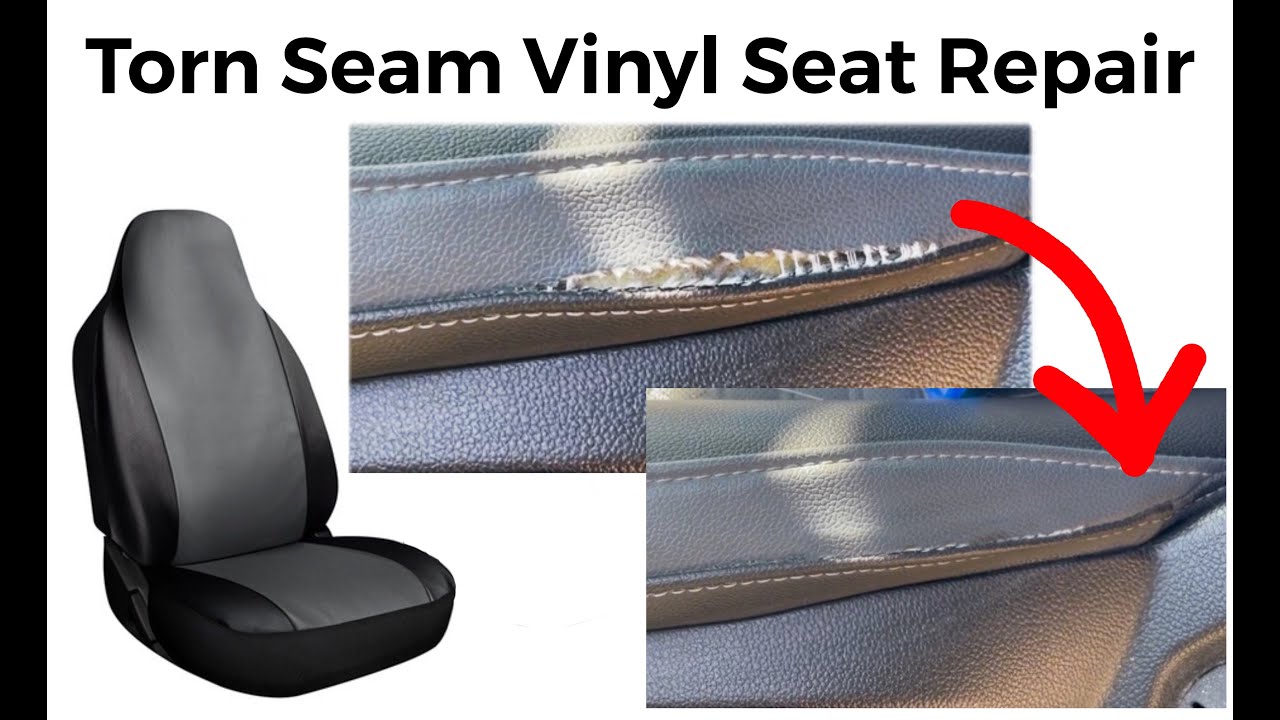
Seam Sealant Application
Seam sealants work best for rips along seams. They provide a strong, flexible bond. First, clean the seam area with alcohol wipes. This removes oils and residues. Gently pull the seam apart to expose the edges. Apply a thin line of seam sealant along one edge.
Press the edges together firmly. Hold them until the sealant sets. Use a clamp or heavy object if needed. Allow the sealant to cure fully. This can take several hours. Once cured, check the seam for gaps. Apply more sealant if necessary. This ensures a durable, long-lasting repair. Your seat will look good as new.
Fixing Cracks And Holes
Repairing a vinyl car seat involves cleaning the damaged area first. Next, apply a vinyl repair kit to fill cracks and holes. Let it dry completely for a seamless finish.
Vinyl car seats can wear down over time, leading to cracks and holes. These imperfections not only affect the aesthetic appeal but also the comfort of your car. Repairing them can be simple with the right approach. This guide will help you restore your vinyl seats to their former glory.
Filling And Patching
To start, clean the seat thoroughly with mild soap. Dirt and debris can hinder repair efforts. Once clean, examine the cracks or holes closely. Use a vinyl repair kit for filling. These kits often include a filler and applicator. Apply the filler to the damaged areas. Ensure it covers the cracks and holes completely. Let the filler dry according to the instructions provided.
Smoothing And Finishing
After the filler dries, smooth the surface using sandpaper. Choose fine-grit sandpaper for best results. Gently sand the area until smooth. This step ensures the patch blends seamlessly with the rest of the seat. Next, apply a vinyl colorant to match the seat’s color. Use a sponge or brush for an even application. Allow the colorant to dry thoroughly. Finally, apply a vinyl sealant for protection. This will keep your repairs looking fresh longer.
Credit: www.youtube.com
Addressing Stains And Discoloration
Eliminating stains and discoloration on vinyl car seats can restore their look. Use mild soap and warm water to gently clean the surface. For stubborn spots, apply a specialized vinyl cleaner for effective results.
Vinyl car seats often face stains and discoloration. Everyday use can lead to spills and marks. These blemishes can make seats look old. Regular cleaning can help maintain their appearance. It can also extend the life of the seats. Cleaning vinyl seats requires the right approach. Not all cleaners are suitable. Using the wrong product can damage the material. It’s important to choose wisely.
Choosing The Right Cleaner
Select a cleaner designed for vinyl. Check the label before use. Some products contain harsh chemicals. These can harm the seat’s surface. Eco-friendly options are often safer. They are gentle yet effective. Test the cleaner on a small area first. This ensures it won’t cause damage. Wait a few minutes and check the result. If no discoloration occurs, proceed with cleaning.
Application Techniques
Use a soft cloth for applying the cleaner. Avoid using abrasive materials. They can scratch the vinyl. Apply the cleaner in a circular motion. This helps lift dirt and stains. Rinse the cloth with water. Wipe the seat to remove cleaner residue. Repeat the process if stains persist. For tough stains, a soft brush might help. Be gentle to avoid damaging the vinyl. Dry the seat with a clean towel. Ensure no moisture is left. Moisture can lead to mold or mildew. Proper drying is crucial for seat longevity. Regular maintenance keeps vinyl seats looking new. Clean spills immediately to prevent stains. This simple habit can save time and effort. `
Maintaining Vinyl Car Seats
Vinyl car seats offer style and comfort. Proper care ensures they last. Regular upkeep prevents damage, keeping them looking new. Learn how to maintain your seats effectively. Protect your investment with simple tips.
Regular Cleaning Tips
Clean seats weekly to remove dirt. Use a soft cloth with warm water. Avoid harsh chemicals; they damage vinyl. Mild soap works well for stubborn stains. After cleaning, dry seats with a towel. Moisture causes mold and odors.
Preventive Measures
Protect seats from direct sunlight. Sun fades and cracks vinyl. Park in shaded areas if possible. Use seat covers for added protection. They guard against spills and wear. Keep sharp objects away from seats. Scratches weaken the material.
Credit: www.familyhandyman.com
Frequently Asked Questions
How Can I Fix Small Tears In Vinyl Seats?
To repair small tears in vinyl car seats, use a vinyl repair kit. Clean the area first, apply adhesive, and let it dry. Then, use a color-matching filler to fill the tear. Finally, apply a topcoat to seal and protect the repair.
This method ensures a durable and seamless fix.
What Tools Are Needed For Vinyl Seat Repair?
You’ll need a vinyl repair kit, which includes adhesive, filler, and applicators. A heat gun can help smooth out repairs. Additionally, clean cloths and a mild cleaner are necessary for surface preparation. These tools ensure an effective and lasting repair, restoring the seat’s appearance and function.
Can I Use A Patch For Vinyl Seat Repair?
Yes, patches are effective for larger tears. Cut a vinyl patch slightly larger than the tear, apply adhesive, and press firmly. Ensure the patch matches the seat color for a seamless look. This method is simple and provides a durable solution for significant damage.
How Do I Prevent Future Damage To Vinyl Seats?
Regular maintenance helps prevent damage. Clean seats with a mild cleaner and avoid harsh chemicals. Use seat covers to protect from sun exposure and sharp objects. Periodically inspect for early signs of wear. These steps enhance the longevity and appearance of vinyl seats.
Conclusion
Repairing a vinyl car seat is simple with the right steps. Start by gathering your materials. Clean the seat thoroughly to remove dirt. Use a repair kit for small tears or holes. Follow the instructions carefully for best results. Allow the repair to dry completely.
Regular maintenance prevents future damage. A well-maintained seat looks great and lasts longer. Practice these steps and keep your car interior looking fresh. Enjoy the comfort of your car with a flawless seat. Your car will thank you with every drive.


