


How to Deep Clean a Car Seat: Ultimate Guide

Do you ever find yourself cringing at the stains and crumbs on your car seat? Imagine driving with a fresh, spotless seat beneath you.
Sounds nice, right? A clean car seat isn’t just about appearances. It can also make your ride more comfortable and even increase your car’s value. But how do you achieve that deep clean without spending a fortune at the car wash?
This guide is designed just for you. We’ll walk you through simple, effective steps to transform your car seats from grimy to gleaming. Ready to enjoy a cleaner ride? Let’s dive in and discover the secrets to a spotless car seat that you’ll love every time you hit the road.
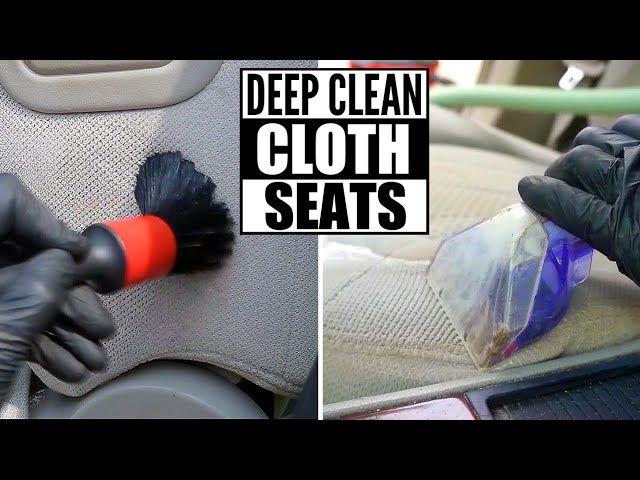
Credit: www.youtube.com
Materials Needed
Cleaning a car seat requires specific materials for best results. Having the right supplies makes the task easier and more effective. Gather these materials to ensure your car seat looks fresh and tidy.
Vacuum Cleaner
A vacuum cleaner helps remove loose dirt and debris. Use one with a nozzle attachment to reach tight spaces. A handheld vacuum is ideal for small areas.
Microfiber Cloths
Microfiber cloths are gentle on fabric and leather. They help in wiping down surfaces without scratching. Keep several on hand for different cleaning stages.
Soft Bristle Brush
A soft bristle brush is essential for scrubbing stains. It helps to break up dirt and grime effectively. Choose a brush suitable for fabric or leather.
Fabric Or Leather Cleaner
Choose a cleaner suitable for your car seat material. Fabric cleaners work well on cloth seats. Leather cleaners are tailored for leather surfaces.
Bucket Of Warm Water
Warm water is necessary for rinsing and cleaning. It helps to dilute cleaning solutions. Ensure the water is not too hot for delicate materials.
Spray Bottle
A spray bottle helps apply cleaning solutions evenly. It allows controlled application on specific areas. Fill it with water or diluted cleaner for easy use.
Vacuum Attachment
Vacuum attachments are crucial for detailed cleaning. They help reach between seat crevices. Use them to remove embedded dirt effectively.
Protective Gloves
Protective gloves keep your hands safe from chemicals. Wear them while handling cleaners and water. They also prevent skin irritation.
Dry Towels
Dry towels are necessary for drying surfaces. Use them to absorb excess water. Ensure they are clean and free of lint.
Preparing The Car Seat
Preparing a car seat for deep cleaning is a crucial first step. It ensures effectiveness and thoroughness. Taking time to prepare prevents damage and enhances results. Follow these steps for a spotless car seat.
Removing The Seat
Begin by removing the car seat from your vehicle. This allows you to access every nook and cranny. Check your car manual for instructions on removing the seat safely. Remember to disconnect any wires or attachments carefully.
Inspecting For Damage
Once removed, inspect the car seat for any visible damage. Look for tears, rips, or worn-out areas. Identifying these issues early helps decide repair needs. Check the straps and buckles for functionality. Ensure no parts are broken or missing.
Cleaning Fabric Seats
Fabric car seats can gather dust, dirt, and stains over time. Regular cleaning keeps seats looking fresh and extends their lifespan. This section guides you through the process of deep cleaning fabric seats.
Vacuuming The Surface
Start by vacuuming the seats to remove loose dirt and debris. Use a vacuum with an upholstery attachment for best results. Pay special attention to seams and crevices. A clean surface ensures better stain removal.
Spot Cleaning Stains
Identify any stains on the fabric. Use a fabric cleaner suitable for car seats. Spray the cleaner on a cloth, not directly on the seat. Gently blot the stain, avoiding harsh rubbing. For stubborn stains, repeat the process.
Deep Washing Techniques
Prepare a mild soap solution for deep washing. Use warm water and a gentle detergent. Dampen a soft cloth with the solution. Gently scrub the seat in small circles. Avoid soaking the fabric to prevent mold.
Rinse the cloth and wipe off any soap residue. Let the seats air dry completely before using the car. This prevents any musty odors.
Cleaning Leather Seats
Transform dirty leather seats into spotless ones with deep cleaning. Use a gentle cleaner and soft cloth. Scrub in small circles. Dry with a towel. Enjoy fresh, clean car seats.
Cleaning leather seats requires special attention and care. Leather, while durable, can be sensitive to harsh chemicals and improper cleaning methods. To maintain their pristine condition, a systematic approach is crucial. A thorough cleaning not only enhances the seats’ appearance but also extends their lifespan.Dusting And Vacuuming
Begin with dusting and vacuuming. Use a soft brush attachment to remove loose dirt and dust. This prevents scratches during cleaning. Make sure to reach crevices and seams. These areas often trap debris. A handheld vacuum is ideal for this task. It offers precision and ease.Applying Leather Cleaner
Choose a cleaner designed for leather. Avoid harsh chemicals that can damage the material. Apply the cleaner with a microfiber cloth. Gently rub in circular motions. This helps lift stains and grime. Always test the cleaner on a hidden spot first. Ensure it’s safe for your leather type.Conditioning The Leather
Conditioning keeps leather supple and prevents cracking. Apply a quality leather conditioner. Use a clean cloth for even coverage. Let the conditioner sit for a few minutes. Then, buff the surface with a dry cloth. Regular conditioning maintains the leather’s natural oils. This step completes the cleaning process.Addressing Common Issues
Car seats are prone to everyday mishaps. Spills, odors, and stains are common. Regular cleaning keeps them fresh and comfortable. Deep cleaning addresses persistent issues effectively.
Odor Removal
Car seats often absorb unpleasant smells. Food, drinks, and sweat contribute to these odors. Baking soda is a natural deodorizer. Sprinkle it generously on the seat. Let it sit for several hours. Vacuum thoroughly to remove residue. Vinegar and water can also help. Mix equal parts in a spray bottle. Lightly mist the seat, avoiding saturation. Let it air dry completely. Essential oils offer a pleasant scent. Add a few drops to the baking soda before use.
Mold And Mildew Treatment
Mold and mildew thrive in damp environments. Car seats are no exception. First, wear gloves and a mask for protection. Mix vinegar and water in a spray bottle. Spray the affected areas lightly. Scrub gently with a soft brush. Ensure not to damage the fabric. For stubborn mold, use hydrogen peroxide. Apply it directly to the spots. Scrub and wipe with a clean cloth. Air out the car thoroughly. Sunlight helps eliminate residual moisture.

Credit: soapyshark.com
Reassembling The Seat
Begin by removing the seat from the car. Clean each part separately for thoroughness. Ensure all dirt and stains are scrubbed away. Once dry, reassemble carefully, checking each component for proper fit and security. A clean seat enhances your car’s interior and comfort.
Reassembling the seat after a deep clean is essential. Proper reassembly ensures safety and comfort during travel. It’s crucial to follow steps carefully. This guarantees the seat functions as intended. Let’s dive into the process of reassembling your car seat.Drying The Seat
Drying the seat is a critical step. Ensure the seat is completely dry before reassembly. Moisture can lead to mold and unpleasant odors. Use a fan or a blow dryer on a low setting. This speeds up the drying process effectively. Place the seat in a warm, ventilated area. Check all nooks and crannies for lingering dampness. Patience is key here. A thoroughly dry seat ensures longevity and hygiene.Reinstalling Properly
Reinstalling the car seat correctly is paramount. Start by referring to the manufacturer’s manual. This provides specific instructions for your seat model. Begin with the base, ensuring it’s secured tightly. Follow with the backrest, aligning it properly. Check all clips and fasteners. They should click securely into place. Test the seat’s stability by shaking it gently. Ensure the seat belts are threaded correctly through the slots. This guarantees both safety and comfort during use.
Credit: www.actonservicecentre.co.uk
Frequently Asked Questions
What Materials Do I Need For Deep Cleaning?
To deep clean a car seat, gather a vacuum, upholstery cleaner, soft brush, microfiber cloth, and a spray bottle. These materials help effectively remove dirt and stains. Ensure the cleaner is suitable for your seat material to avoid damage.
How Often Should Car Seats Be Deep Cleaned?
Deep clean car seats every three to six months. Regular cleaning prevents buildup of dirt and allergens. If you frequently transport kids or pets, consider cleaning more often to maintain hygiene and appearance.
Can I Use Homemade Solutions For Cleaning?
Yes, you can use homemade solutions for car seats. Mix equal parts of vinegar and water for a simple cleaner. Test on a small, hidden area first to ensure it doesn’t damage the fabric.
How Do I Remove Tough Stains From Car Seats?
To remove tough stains, apply upholstery cleaner and gently scrub with a soft brush. Let the cleaner sit for a few minutes. Then, wipe with a damp microfiber cloth. Repeat the process if necessary for stubborn stains.
Conclusion
Clean car seats enhance comfort and aesthetics. Regular maintenance prevents stains and odors. Simple steps lead to impressive results. Use mild soap and warm water. Focus on visible stains first. Vacuum crumbs and dust thoroughly. Pay attention to seams and corners.
Dry seats completely to prevent mold. Patience is key for deep cleaning success. Enjoy a fresh, inviting car interior. Share these tips with friends. Keep your car seats looking new. Regular care ensures lasting beauty and comfort. Deep cleaning is worth the effort.
A clean car seat makes every drive enjoyable.


