How to Touch Up Car Paint: Easy Steps for a Flawless Finish

Touching up car paint might sound difficult, but with the right approach, it’s a task that many car owners can handle themselves. Scratches, chips, and small rust spots are common, especially as a car gets older. While a professional paint job can cost hundreds or even thousands of dollars, touching up minor paint damage at home saves money and keeps your car looking fresh.
If you’ve never done this before, don’t worry. This guide will walk you through everything you need to know to touch up car paint, avoid beginner mistakes, and protect your vehicle’s value.
Understanding Car Paint Damage
Before you start, it’s important to understand types of paint damage. Not all scratches or chips are the same, and the repair method depends on the depth and size of the damage.
- Surface Scratches only affect the clear coat.
- Deeper Scratches go through the color layer.
- Paint Chips are small spots where paint is missing.
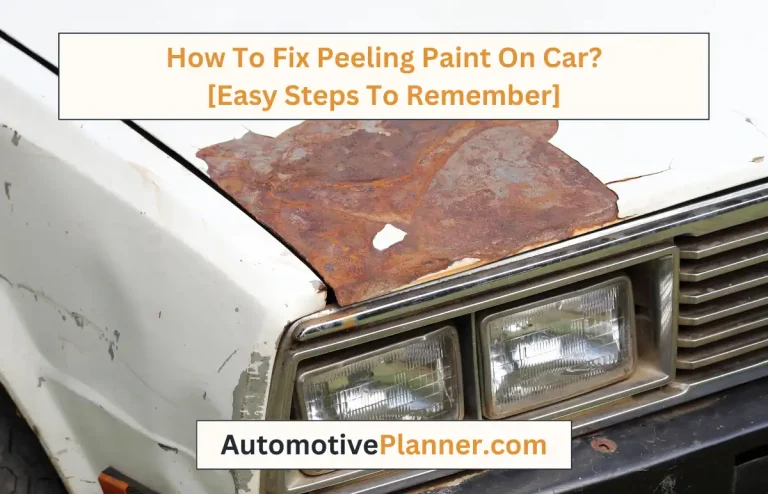
- Rust Spots appear when bare metal is exposed for a while.
Most car paint touch-ups are for chips or scratches that haven’t reached the metal. If there’s rust, you’ll need to remove it before painting.
Why Touching Up Matters
Small paint damage doesn’t just look bad—it can lead to bigger problems. Exposed metal starts to rust, and the paint around the damage can peel. Over time, these small spots can become large, expensive repairs. Touching up early stops rust and keeps your car’s finish strong.
What You Need: Tools And Materials
Having the right materials makes the job easier and gives you better results. Here’s what you’ll need:
- Touch-up paint that matches your car’s color code
- Primer (for chips down to bare metal)
- Clear coat for protection and shine
- Fine sandpaper (1000-2000 grit)
- Rubbing alcohol or wax and grease remover
- Microfiber cloths
- Small paintbrush or toothpick
- Masking tape and paper
- Polishing compound
- Gloves (optional but helpful)
Finding the right paint code is crucial. You can usually find it on a sticker in the driver’s door jamb, under the hood, or in the owner’s manual.
Preparing The Area
Preparation is the key to a smooth, invisible touch-up. Many beginners skip steps here and end up with bumpy or mismatched spots.
Step 1: Clean The Surface
Wash the area with car soap and water. Dry it with a microfiber cloth. Then wipe the damaged spot with rubbing alcohol or wax and grease remover. This removes oils and dirt so the new paint will stick well.
Step 2: Sand The Damage
If the damage is deep or there’s a rough edge, gently sand the area with fine sandpaper. Sand just enough to smooth out the edges. Don’t sand too much—just enough so the touch-up paint blends in.
Step 3: Remove Rust
If you see any rust, you must remove it completely. Use sandpaper to rub away all the brown or orange areas. If rust stays, it will grow under the new paint.
Step 4: Mask Around The Damage
Use masking tape and paper to cover the area around the chip or scratch. This protects the good paint from accidental smears or drips.
Applying Primer (if Needed)
Primer is only needed if the damage goes through to bare metal. It helps the paint stick and prevents rust.
- Shake the primer well.
- Use a tiny brush or toothpick to apply a thin layer just to the damaged spot.
- Let it dry completely (usually 20-30 minutes).
Don’t use too much primer; thick layers can make the repair stand out.
Touching Up The Paint
Now comes the most important part—applying the new paint. Take your time. Rushing is the most common mistake.
Step 1: Shake The Paint
Shake the touch-up paint bottle for at least a minute. This mixes the color so it matches better.
Step 2: Apply Thin Layers
Dip a small brush or toothpick into the paint. Apply a tiny amount to the damaged area. Don’t try to cover it all at once. Let each layer dry for 20-30 minutes, then add another if needed. Usually 2-3 thin layers work best.
Thick paint blobs are hard to fix and will look obvious when dry. Thin, slow layers blend better.
Step 3: Let The Paint Cure
After your last layer, let the paint dry for at least a few hours. For best results, wait overnight. This helps the paint harden and match the rest of your car.
Applying Clear Coat
Clear coat protects the repair and gives it a glossy shine. Use a new brush or the applicator in the bottle.
- Apply a thin layer just over the painted spot.
- Let it dry fully (30-60 minutes).
- Add a second layer if needed.
Don’t skip clear coat—without it, the repair will fade and stand out.
Blending And Polishing The Repaired Area
After the clear coat is dry, you might notice the repaired spot feels raised or looks dull. Blending and polishing helps hide the repair.
Step 1: Light Sanding (optional)
If the repaired spot is uneven, use very fine sandpaper (2000 grit) to gently sand it flat. Use water while sanding and go slowly.
Step 2: Polish The Area
Apply a small amount of polishing compound to a microfiber cloth. Rub gently in circles over the repaired area. This brings back the shine and helps blend the new paint with the old.
Step 3: Wax For Extra Protection
Wait a few days, then wax the area to protect your work. Don’t wax right after painting—the paint needs time to fully cure.
Comparing Diy Vs. Professional Touch-up
Many car owners wonder if they should try touching up paint themselves or pay a professional. Here’s a quick comparison:
| Aspect | DIY Touch-Up | Professional Repair |
|---|---|---|
| Cost | $20–$50 for materials | $100–$500 or more |
| Time | 2–4 hours (including drying) | 1–2 days (shop time) |
| Skill Needed | Basic DIY skills | Professional experience |
| Results | Good for small spots | Excellent, invisible repair |
DIY works well for small chips and scratches. For large or complex damage, a professional is often worth the cost.
Common Mistakes To Avoid
Even careful people make mistakes the first time. Here are some mistakes beginners often make:
- Skipping surface cleaning—dirt and oil stop paint from sticking.
- Using the wrong color—always check your car’s paint code.
- Applying thick layers—thick paint looks messy and can peel.
- Not waiting between coats—paint will bubble or wrinkle.
- Not using clear coat—the repair will fade fast.
- Touching the repair before dry—fingerprints ruin the finish.
- Ignoring rust—rust will spread under new paint.
How To Get The Right Paint Match
Matching your car’s paint is harder than it sounds. Every car has a unique paint code. Even the same color name can be slightly different between years and models.
- Find your car’s paint code (usually in the driver’s door or manual).
- Order paint from a trusted supplier—not all touch-up paints are equal.
- Test paint on an old surface (like a piece of cardboard) before touching your car.
If you’re unsure, ask a local auto parts store or dealer for help.
When Touch-up Isn’t Enough
Touch-up paint is great for small chips and scratches. But if you have:
- Multiple large scratches
- Big rust spots
- Faded or peeling paint over a large area
It’s better to get a professional repair. Large damage needs sanding, priming, and sometimes re-spraying entire panels. Touch-up paint can’t fix these problems and may even make them look worse.
Tips For Best Results
Here are some tips that many guides miss, but can make your touch-up look professional:
- Work in good lighting so you see every detail.
- Paint in mild weather (not too hot or cold). Best temperature: 60-75°F (15-24°C).
- Keep tools clean—dirty brushes leave streaks and bumps.
- Practice on something else first if you’ve never used touch-up paint.
- Store leftover paint for future repairs, tightly sealed in a cool place.
Real-life Example
Let’s look at a quick example. Sam noticed a coin-sized chip on his silver sedan’s door. He bought matching touch-up paint for $25 and spent an afternoon following the steps above: cleaned the spot, sanded lightly, applied primer, three thin paint layers, and two clear coats. After polishing, the chip was almost invisible—saving him over $200 compared to a body shop estimate.
Comparing Touch-up Paint Types
There are different types of touch-up paint. Here’s a quick overview:
| Type | Best For | Pros | Cons |
|---|---|---|---|
| Bottle with brush | Small chips, scratches | Easy to use, affordable | Hard to blend on large areas |
| Paint pen | Tiny chips, scratches | Precise, no mess | Limited paint flow, not for large spots |
| Spray can | Larger spots, panels | Covers more area, good blending | Harder to control, needs masking |
For most DIY repairs, a bottle with brush or paint pen works best.
How Long Does A Touch-up Last?
A good touch-up can last for years if done right and protected with wax. However, repairs may fade faster if exposed to sun, rain, or road salt. Regular washing and waxing help keep the repair looking new.
Where To Learn More
If you want more details on car paint types and repair, check this Automotive Paint Wikipedia page for deeper reading.
Frequently Asked Questions
How Do I Find My Car’s Paint Code?
Most cars have a sticker with the paint code in the driver’s door jamb, under the hood, or in the owner’s manual. If you can’t find it, ask your dealer or look online for your car’s make and model.
Can I Use Nail Polish As Touch-up Paint?
It’s not recommended. Nail polish doesn’t match car paint color or durability, and it won’t protect against rust or weather. Always use automotive touch-up paint for lasting results.
How Long Should I Wait Before Washing My Car After A Touch-up?
Wait at least 7 days before washing with soap or wax. This gives the new paint and clear coat time to fully cure and harden.
What If I Make A Mistake During Touch-up?
If the paint is still wet, wipe it off with a microfiber cloth and start again. If it’s dry, you can lightly sand the area and reapply primer and paint as needed.
Is It Worth Touching Up Old Cars?
Yes. Even older cars benefit from touch-up paint. It helps prevent rust, keeps the car looking better, and can even improve resale value.
Touching up car paint isn’t just about looks—it protects your car from bigger problems. With patience and careful steps, you can handle most small paint repairs yourself and keep your car looking its best for years to come.