How To Clean Car Headlight Covers? [Simple Steps]
Are your car’s headlight covers losing their clarity, hindering your visibility on the road? Faded, yellowed, or dirty headlight covers not only compromise safety but also detract from your vehicle’s overall appearance. The good news is that restoring and maintaining your car’s headlight covers can be a straightforward task. So how to clean car headlight covers to bring a fresh look.
The process of cleaning car headlight covers involves a systematic approach to restore clarity and enhance visibility. From initial dirt removal and soapy water cleaning to optional steps like toothpaste polishing and protective coatings, each step contributes to a thorough restoration.
This guide will take you through a comprehensive step-by-step process to clean car headlight covers effectively. Get ready to enhance both the safety and aesthetics of your vehicle with a well-maintained set of sparkling clear headlight covers.
9 Steps To Clean Car Headlight Covers:
Cleaning car headlight covers is an essential part of maintaining your vehicle’s appearance and ensuring optimal visibility. Here are detailed steps to help you clean your car headlight covers:
Step 1: Remove Dirt And Grime
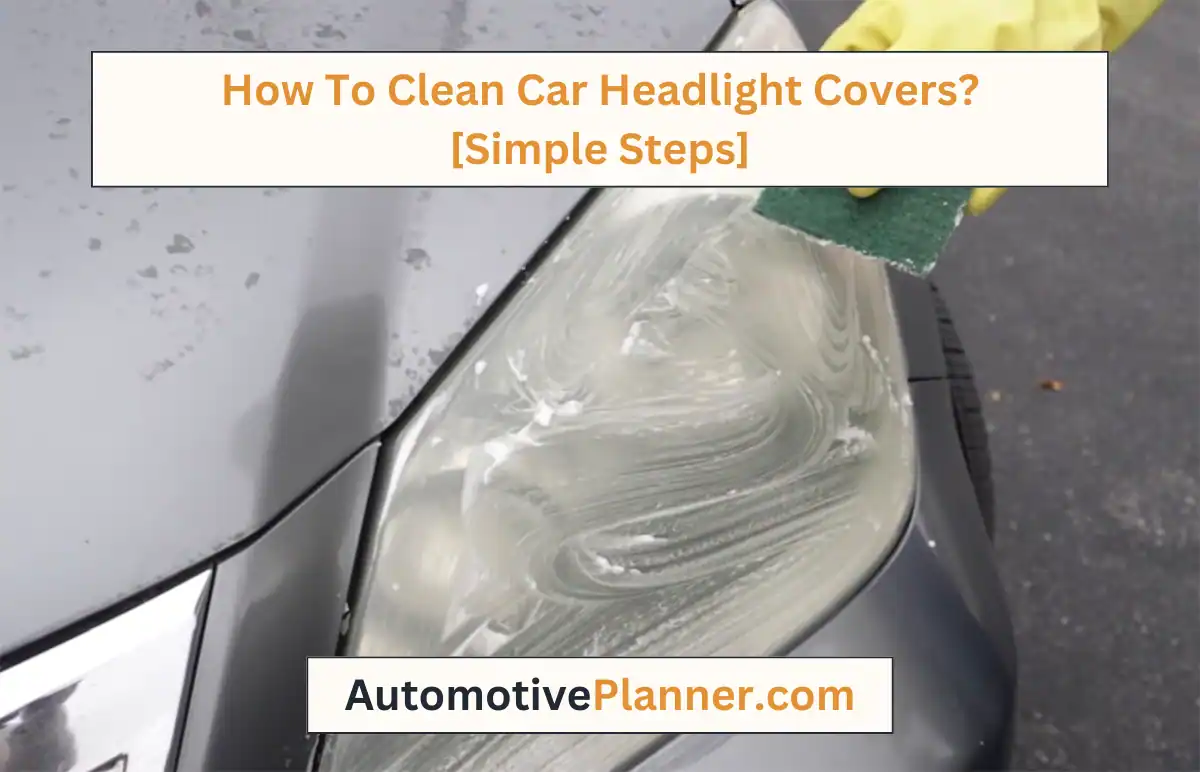
Removing dirt and grime is crucial for achieving clean and clear car headlight covers. Start by rinsing the covers thoroughly with water to loosen and dislodge surface debris.
Use a gentle stream from a hose or a bucket of water, avoiding abrasive tools that could cause scratches.
This initial rinse helps eliminate loose dirt and prepares the covers for further cleaning steps. Ensuring a clean surface at the outset facilitates the effectiveness of subsequent cleaning agents, promoting optimal results in the overall restoration process.
It sets the foundation for a thorough and successful headlight cover cleaning procedure.
Step 2: Prepare Soapy Water Solution
After removing loose dirt, the next step involves creating a soapy water solution to effectively clean the car headlight covers. Mix a small amount of mild dish soap with water to form a gentle yet effective cleaning solution.
This soapy mixture serves to break down and lift the remaining contaminants from the surface of the covers.
Dip a soft cloth or sponge into the solution, ensuring it is saturated but not overly wet. With the soapy cloth or sponge, gently scrub the headlight covers, paying particular attention to areas with stubborn dirt or bug residue.
This step prepares the covers for a more thorough cleaning and sets the stage for subsequent polishing and restoration efforts.
Step 3: Rinse Thoroughly
Once you’ve scrubbed the headlight covers with the soapy water solution, the next critical step is to thoroughly rinse the covers.
Use a steady stream of clean water, such as from a hose or a bucket, to ensure that all soap residue is completely washed away.
Thorough rinsing is essential to prevent streaks and soap buildup, which can affect the clarity of the headlight covers. Pay special attention to crevices and edges, ensuring that no soapy residue remains.
A comprehensive rinse not only removes contaminants lifted by the soap but also provides a clean canvas for subsequent cleaning and polishing steps. This step is vital for achieving a pristine and clear finish on your car’s headlight covers.
Step 4: Dry The Headlight Covers
After the thorough rinse, it’s crucial to dry the headlight covers completely. Use a clean and dry microfiber or cotton cloth for this task.
Drying prevents water spots and ensures a clear surface for subsequent cleaning and polishing steps. Gently pat and wipe the covers, paying attention to any remaining moisture in corners or crevices.
Adequate drying also prepares the headlight covers for the polishing agents that will be applied in later steps. Having a dry surface facilitates the cleaning process, as well as ensuring a professional finish and enhancing the clarity of the headlights.
Step 5: Apply Toothpaste For Polishing
With the headlight covers clean and dry, the next step involves using non-gel toothpaste for polishing. Apply a small amount of toothpaste onto a clean, dry cloth.
The toothpaste acts as a mild abrasive, aiding in the removal of yellowing and minor scratches on the headlight covers.
Using circular motions, gently rub the toothpaste onto the covers. Be thorough in your application, focusing on areas with noticeable discoloration or imperfections. This polishing step not only improves clarity but also helps restore the headlight covers’ original shine.
After polishing, rinse the covers again to remove any residual toothpaste and inspect the results. This step is particularly effective for addressing surface-level blemishes and enhancing overall headlight appearance.
Step 6: Rinse And Inspect
Following the toothpaste polishing, it’s crucial to rinse the headlight covers once again to remove any remaining toothpaste residue. Use a stream of clean water to thoroughly wash away the toothpaste, ensuring a clean and residue-free surface.
After rinsing, take a moment to inspect the headlight covers. Assess the clarity and cleanliness of the surfaces. Look for any remaining discoloration, scratches, or imperfections.
This inspection allows you to determine the effectiveness of the toothpaste polishing and helps identify areas that may require additional attention.
If the results are satisfactory, you can proceed to subsequent steps. However, if any issues persist, consider repeating the toothpaste polishing step or exploring more advanced polishing compounds for further restoration.
Regular inspection ensures that the cleaning process meets your expectations and contributes to optimal headlight performance and appearance.
Step 7: Apply Plastic Or Metal Polish (Optional)
For enhanced restoration, especially if the headlight covers exhibit persistent oxidation or minor scratches, consider using a specialized plastic or metal polish.
Apply a small amount of the polish onto a clean, dry cloth. Gently buff the headlight covers using circular motions, focusing on areas with visible imperfections.
Plastic or metal polish is formulated with fine abrasives designed to smooth out minor scratches and restore clarity. This step contributes to a more polished and refined finish, further improving the overall appearance of the headlight covers.
After applying the polish, inspect the covers again to ensure the desired level of clarity has been achieved. If necessary, repeat the process until you are satisfied with the results.
While optional, using a plastic or metal polish can significantly enhance the visual appeal of your car’s headlights.
Step 8: Consider Using Automotive Polishing Compound (Optional)
In cases where the headlight covers exhibit more severe oxidation or deeper scratches, you may opt to use an automotive polishing compound for additional restoration.
Apply a small amount of the polishing compound to a clean, dry cloth. Gently rub the compound onto the headlight covers using circular motions, applying moderate pressure.
Automotive polishing compounds typically contain finer abrasives than regular polishes, allowing them to effectively remove deeper imperfections. This step aids in smoothing out scratches and further improving the clarity of the headlight covers.
After applying the polishing compound, carefully inspect the covers to assess the results. If needed, repeat the process until you achieve the desired level of restoration.
Though considered an optional step, using an automotive polishing compound can be particularly beneficial for addressing more significant wear and tear on the headlight covers.
Step 9: Apply UV-resistant Clear Coat (Optional)
To provide long-lasting protection and prevent future oxidation, consider applying an optional UV-resistant clear coat to the freshly polished headlight covers.
Choose a clear coat specifically designed for automotive use. Follow the product instructions carefully for proper application.
Apply the clear coat evenly over the entire surface of the headlight covers using a clean, dry applicator.
This protective layer serves as a barrier against UV rays, environmental elements, and general wear and tear, helping to maintain the clarity and appearance of the covers over time.
Allow the clear coat to dry completely. This final optional step not only adds an extra layer of protection but also contributes to a glossy and well-preserved finish, ensuring that your car’s headlight covers maintain their clarity and aesthetic appeal for an extended period.
Tools:
- Microfiber or soft cotton cloths;
- Plastic or metal polish;
- Automotive polishing compound (optional).
Materials: Mild dish soap, Water, Toothpaste (non-gel), and UV-resistant clear coat (optional).
To-do List To Keep Car Headlight Covers Clean Always:
Maintaining clean and clear car headlight covers requires ongoing care. Here’s a to-do list to help you keep your car’s headlight covers in optimal condition:
Regular Cleaning:
Regular cleaning of car headlight covers is essential for optimal visibility and a well-maintained vehicle. Establish a monthly cleaning routine using a mild soapy water solution and a soft cloth.
Preventive Measures:
Park your car in shaded areas when possible to minimize sun exposure. Consider using a car cover to protect the entire vehicle, including the headlights, from the elements.
Avoid Harsh Chemicals:
Use mild cleaning agents to avoid damaging the headlight covers. Avoid using abrasive materials or harsh chemicals that may cause scratches or deterioration.
Waxing the Covers:
Apply a coat of automotive wax to the headlight covers to provide an additional protective layer. This can help repel dirt and make it easier to clean the covers during regular maintenance.
Check For Damage:
Regularly inspect the headlight covers for cracks, chips, or any signs of damage. Promptly address any issues to prevent further damage and maintain optimal visibility.
Replace Weathered Seals:
Check and replace any weather seals around the headlight covers if they show signs of wear or damage. Proper seals help prevent water and debris from entering the headlight housing.
Avoid Parking Near Construction Sites:
Parking your car away from construction sites is a practical measure to protect the integrity of your headlight covers. Construction areas pose a higher risk of debris, such as rocks, gravel, or building materials, which can cause damage to the covers upon impact.
Related Questions:
Can You Use Regular Glass Cleaner To Clean Your Headlight Covers?
Using regular glass cleaner on headlight covers can be effective for removing surface dirt and grime. However, it may not be sufficient for dealing with oxidation or yellowing caused by prolonged exposure to the elements. Headlight covers are typically made of plastic, and specialized cleaning agents designed for automotive plastics often offer better results.
These products often contain mild abrasives that can help address discoloration and restore clarity. If opting for glass cleaner, ensure it does not contain ammonia, as this can damage plastic.
Consider using dedicated plastic cleaners for a more thorough and safe restoration of your headlight covers.
What’s The Best Method For Removing Yellowing From Headlight Covers?
The best method for removing yellowing from headlight covers involves a multi-step approach. Start by cleaning the covers with a mixture of mild soap and water to remove surface contaminants.
For persistent yellowing, use a specialized plastic cleaner or a headlight restoration kit containing abrasive compounds.
Toothpaste, with its mild abrasives, can also be effective. Apply the chosen product using a soft cloth in circular motions. Follow up with polishing to restore clarity.
For prolonged protection, consider applying a UV-resistant clear coat. Regular maintenance using these methods can help prevent and combat yellowing, ensuring clear and functional headlight covers.
Can You Use Abrasive Materials Like Steel Wool For Cleaning?
Using abrasive materials like steel wool for cleaning headlight covers is not recommended. Steel wool is too abrasive for plastic surfaces, and it can cause scratches and damage to the clear protective coating on the covers.
These scratches may further reduce visibility and compromise the effectiveness of the headlights. Instead, opt for softer materials such as microfiber cloths or soft sponges along with mild cleaning solutions.
Specialized plastic cleaners and polishing compounds designed for automotive use are better suited for safely removing scratches and restoring clarity without causing additional damage to the headlight covers.
Can You Use A Pressure Washer To Clean Your Headlight Covers?
Using a pressure washer to clean headlight covers is generally not recommended. The high-pressure water can be too intense for the delicate plastic surface of the covers, potentially causing damage, scratches, or even dislodging protective seals. Water may also enter the headlight housing, leading to internal issues.
Opt for a gentler cleaning approach with a hose, bucket, and a soft sponge or cloth. If stubborn dirt persists, consider using a mild soapy water solution.
Avoiding high-pressure methods helps preserve the integrity of the headlight covers, ensuring both cleanliness and functionality without risking damage.
What Should You Do If Your Headlight Covers Have Deep Scratches Or Cracks?
If your headlight covers have deep scratches or cracks, consider addressing the issue promptly for both safety and aesthetics. For scratches, use a specialized plastic polish or headlight restoration kit with fine abrasives to minimize their appearance. However, for significant cracks or damage, it’s advisable to replace the entire headlight cover.
Deep cracks may compromise the structural integrity and effectiveness of the headlights.
Consult with a professional or refer to your vehicle’s manual for guidance on obtaining and installing replacement headlight covers to ensure optimal performance and safety on the road.
Is It Necessary To Remove The Headlight Covers For Cleaning?
In most cases, it’s not necessary to remove the headlight covers for routine cleaning. Cleaning can typically be accomplished effectively without disassembling the covers from the vehicle. However, if there are specific issues such as internal condensation, severe damage, or the need for in-depth restoration, removing the headlight covers may become necessary.
In such cases, consult your vehicle’s manual for instructions on proper removal. Regular cleaning and maintenance can usually be performed without removing the covers, making the process more accessible for routine care and ensuring the headlights remain functional and clear.
Conclusion:
Regular and proper maintenance of car headlight covers is crucial for both safety and aesthetics. Follow a systematic method to clean car headlight covers to ensure clarity, longevity, and optimal performance.
Addressing issues such as oxidation and scratches enhances visibility, contributing to safer driving. Ultimately, a well-maintained set of headlight covers elevates the overall appearance and safeguards a critical component for nighttime driving.